![Group 1261151152.png]](https://support.warmy.io/hs-fs/hubfs/Group%201261151152.png?width=50&height=50&name=Group%201261151152.png)

 Prefer to listen? Hit play to hear this article read aloud.
How to configure SPF and DKIM records in Mailgun?
Supported Authentication Methods
✅ SPF: Supported
✅ DKIM: Supported
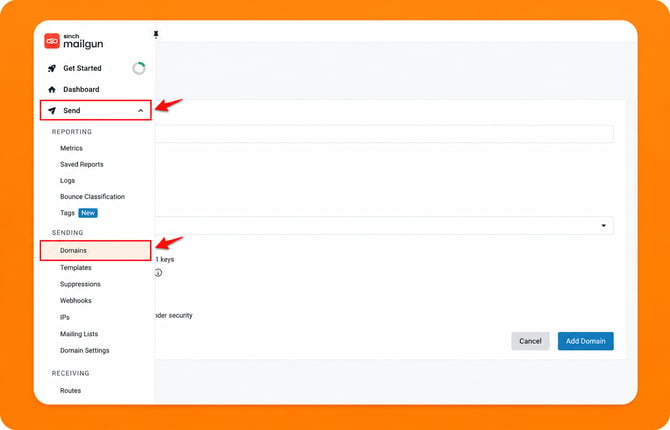
First, Log in to your Mailgun account.

From the left navigation menu, click in Sending → Domains. This is where you'll manage the domain used for sending emails.
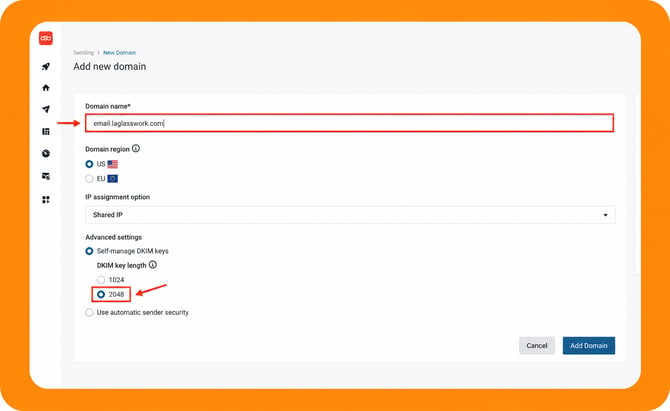
Add a subdomain to your account. When adding the domain, select a 2048-bit DKIM key length, as this is the recommended and most secure option.
Important: Always use a subdomain, not your root domain. Using a subdomain prevents Mailgun's MX records from conflicting with the MX records already configured on your primary domain.
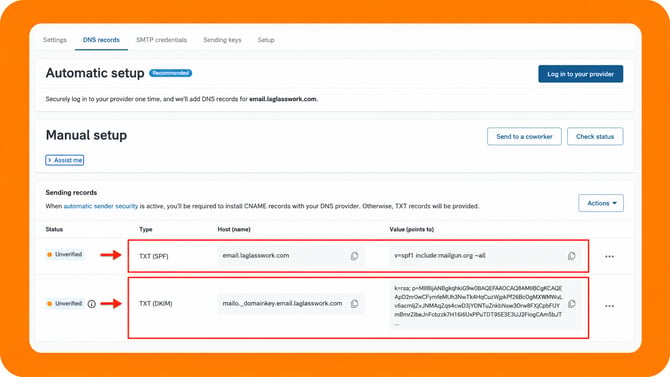
Mailgun – SPF Record Configuration
After adding your subdomain, Mailgun will generate an SPF record.
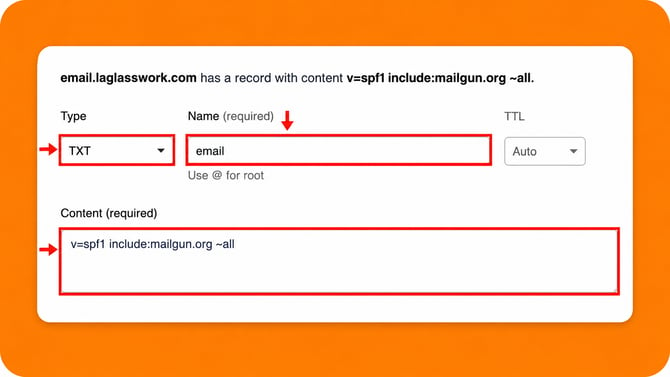
1. Copy the SPF record provided by Mailgun.
2. Open your DNS provider.
3. Add the SPF record to the subdomain you created.
The example below shows how the record appears in Cloudflare.
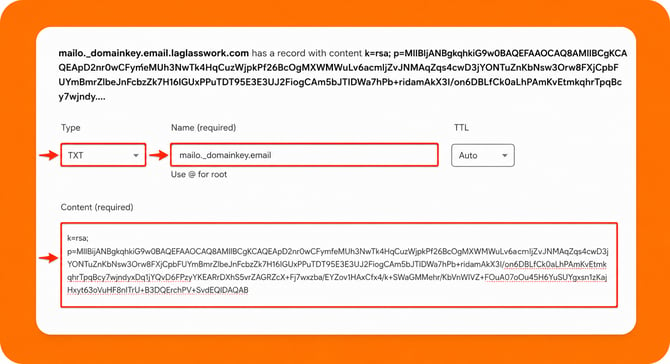
Mailgun – DKIM Record Configuration
Next, configure your DKIM record.
1. Copy the DKIM record generated by Mailgun.
2. Publish it in your DNS zone using your DNS provider.
The example below shows how the record appears in Cloudflare.
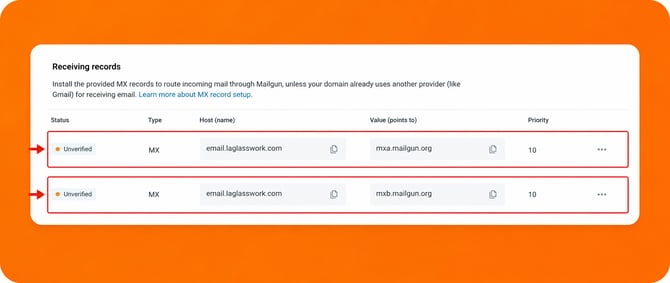
Configure the Additional DNS Records
In addition to SPF and DKIM, Mailgun requires a few extra DNS records to function correctly.
These include:
a) MX records: Required for email routing.
b) Tracking CNAME record: Enables email open and click tracking.
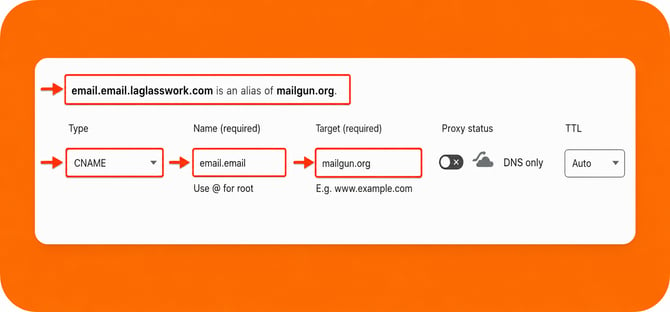
Tracking record:
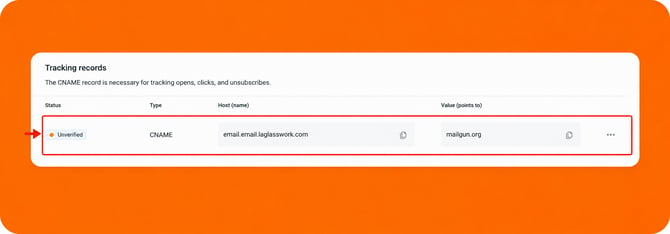
Add the Tracking CNAME record to your DNS configuration. The example below shows how it should look in Cloudflare.
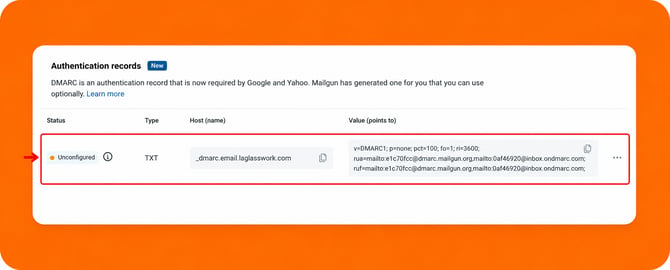
Enable DMARC Reporting
Mailgun now supports DMARC reporting. To enable it, add Mailgun's RUA and RUF email addresses to your existing DMARC record, if you already have one for that subdomain.
Do not create a second DMARC record; each domain should have only one. Simply update the existing record with Mailgun's addresses.
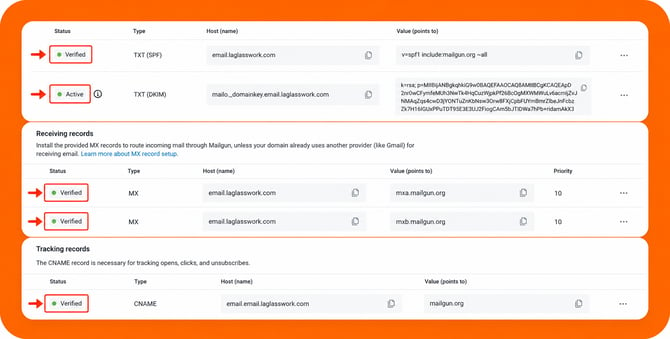
Verify Your DNS Records
Once all DNS records have been added, wait for DNS propagation.
When Mailgun detects the records successfully, each one will display a Verified status next to each record, confirming everything is active.
You can also click Check Status button at any time to verify whether your DNS records have been detected.
Configuration Complete
Your Mailgun SPF and DKIM setup is now complete, and you're ready to send DMARC-compliant emails. Make sure your DMARC record has both aspf and adkim set to relaxed (rather than strict) for best compatibility.