![Group 1261151152.png]](https://support.warmy.io/hs-fs/hubfs/Group%201261151152.png?width=50&height=50&name=Group%201261151152.png)
This guide walks you through setting up the "Update/Rotate Seedlist on HubSpot" n8n workflow. Once configured, every time Warmy updates or rotates your seed list, the workflow automatically mirrors those changes in a HubSpot contact list — adding new seed addresses and removing outdated ones.
Before You Start
Make sure you have the following ready:
- An n8n paid account (self-hosted or cloud)
- A Warmy.io account with an active seed list
- A HubSpot account where you can create contact lists and generate service keys
Step 1 — Import the Workflow into n8n
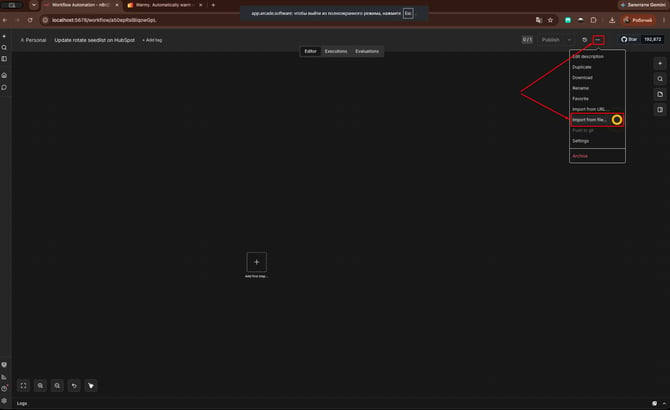
In n8n, open Workflows and create a new workflow or open an empty canvas. Import the provided workflow file Update rotate seedlist on HubSpot.json using the menu (⋯ → Import from File). The full node chain will appear on the canvas.
Click the link to open the workflow JSON file: Update rotate seedlist on HubSpot.json
To save the file to your computer, right-click the link and select "Save link as..."
Step 2 — Install the Warmy Community Node
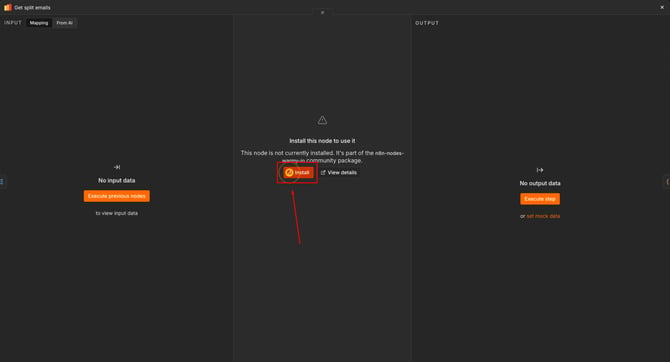
The workflow uses Warmy's community node. To install it, click on any Warmy node in the workflow — for example, Get Split Emails. If the package is missing, n8n will show an Install Community Nodes dialog.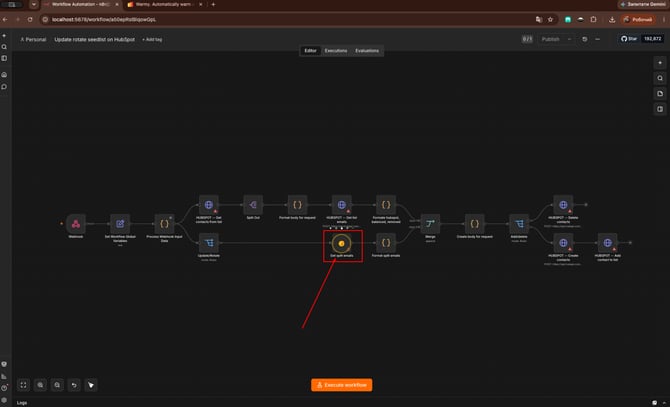
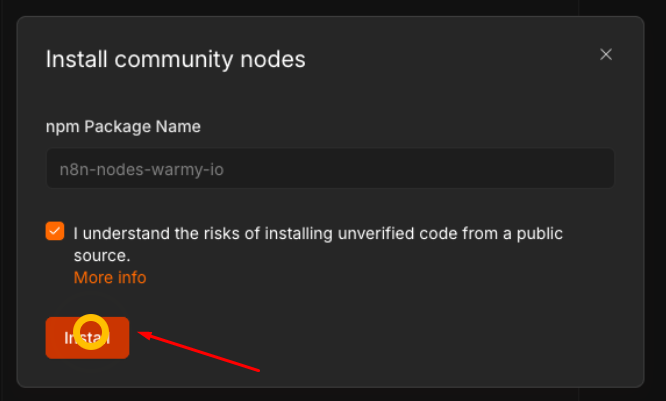
In the npm Package Name field, enter:
n8n-nodes-warmy-io
Check the box confirming you understand the risks, then click Install and wait for confirmation.
Step 3 — Connect Your Warmy Account
Click on any Warmy node in the workflow. To set up the credential, you'll need two things from your Warmy account — your API Token and your Holder UID.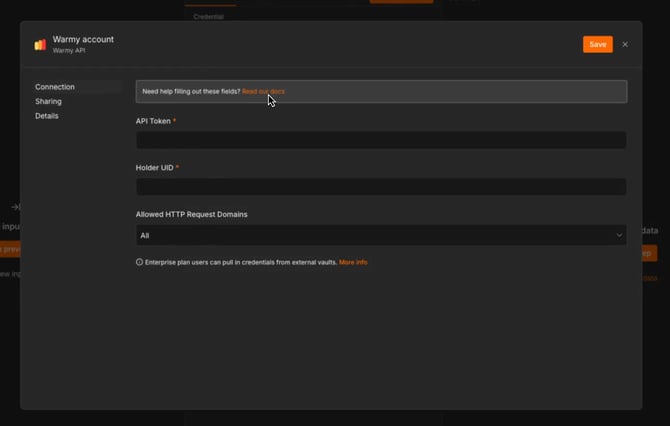
To get your API Token:
Log in to Warmy and go to Workspace Settings → API Keys. Click + API Key, enter a name (for example, "n8n"), and click Create Key. Copy the generated key and make sure the toggle is enabled.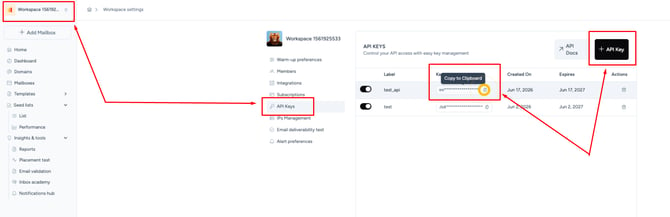
To get your Holder UID:
Open the Warmy API Documentation (accessible via the API Docs link on the API Keys page). In the Authentication section, copy the value shown under Holder-UID Value.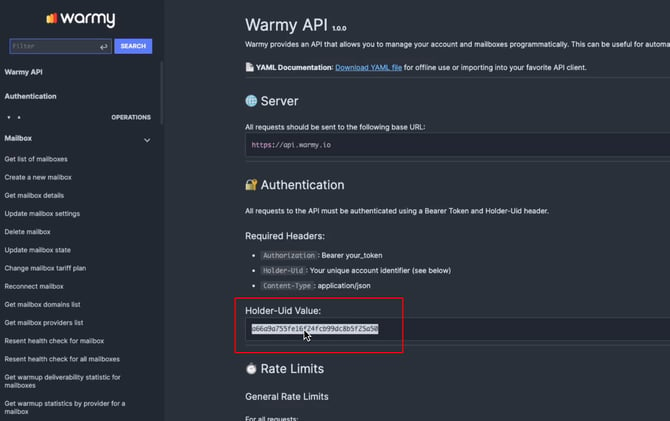
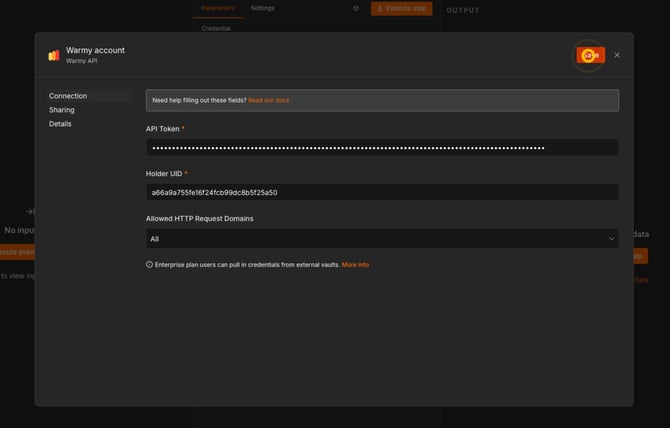
Back in n8n, open any Warmy node, click Create New Credential, and fill in both fields — API Token and Holder UID. Click Save. You should see a "Connection tested successfully" message.
Step 4 — Connect Your HubSpot Account
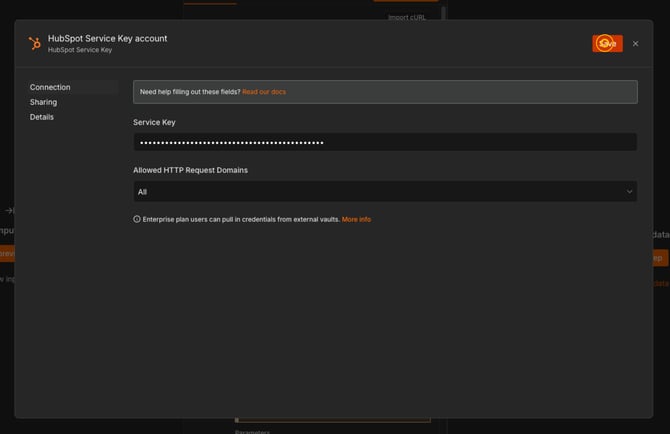
Click on any HubSpot node in the workflow. Set Authentication to Predefined Credential Type and select HubSpot Service Key.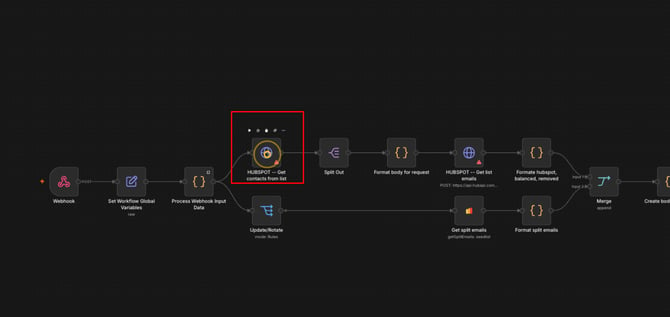
To generate your Service Key, go to HubSpot and navigate to Settings → Integrations → Legacy Apps → Keys → Service Keys. 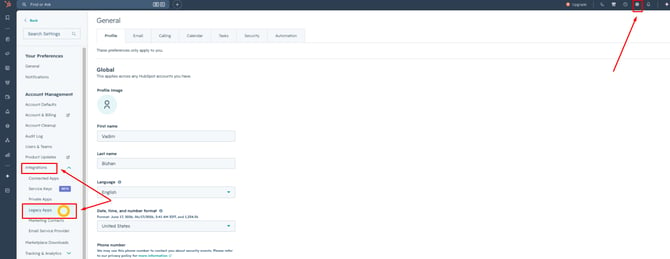
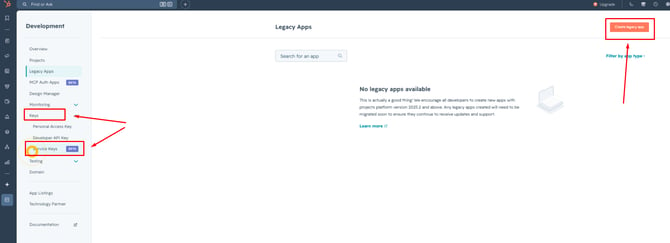
Create a new key and add the following four scopes:
- crm.lists.read
- crm.lists.write
- crm.objects.contacts.read
- crm.objects.contacts.write
Click Create, then copy the generated Service Key. Back in n8n, paste it into the credential and click Save.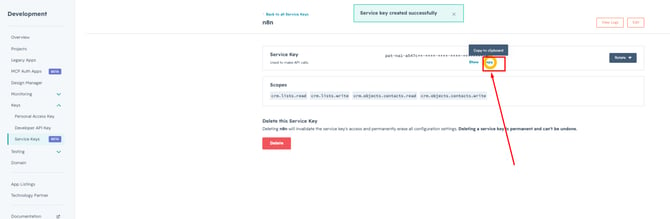
Important: Make sure the HubSpot Service Key credential is selected on all HubSpot nodes in the workflow.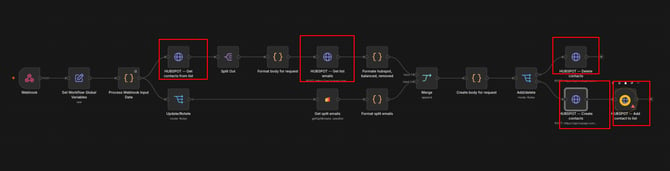
Step 5 — Find Your Warmy Seed List Split ID
Click right button on empty spacr and choose Add node 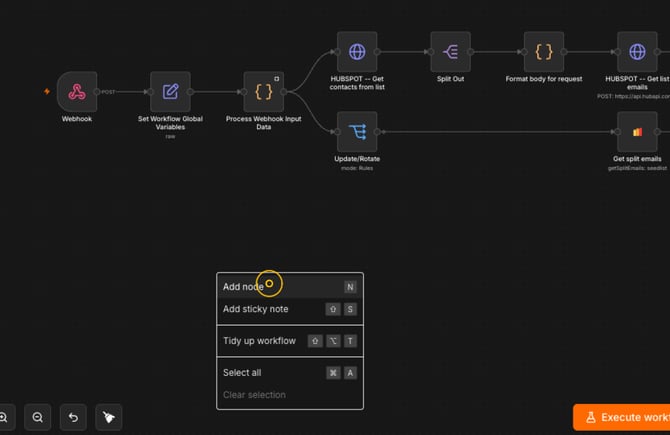 Select Warmy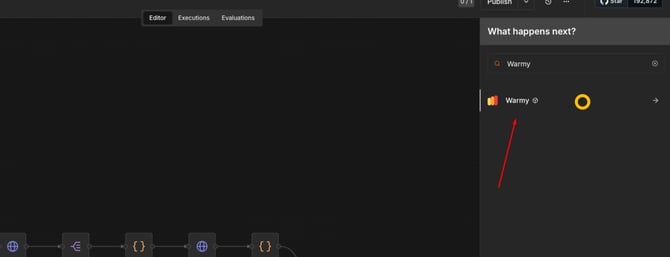
Choose the Get Many Seedlist Splits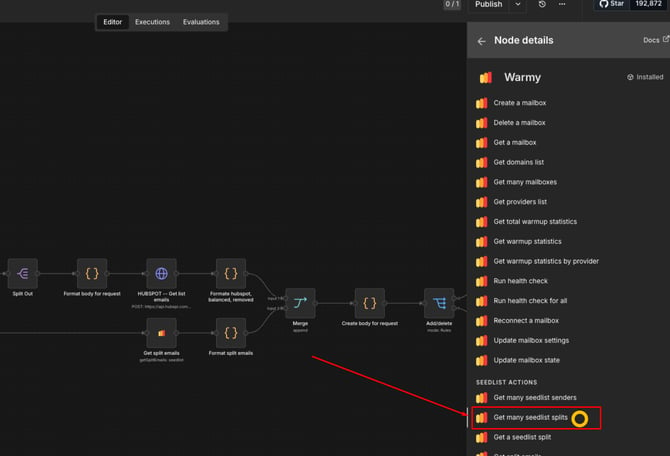
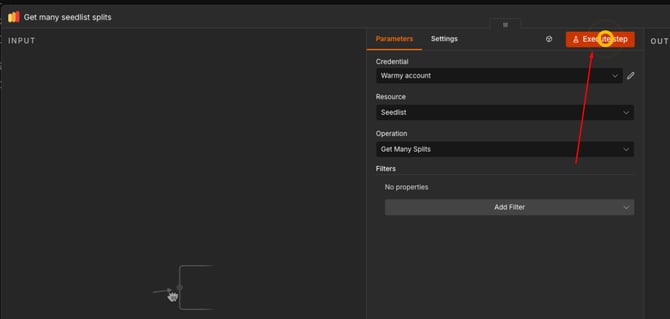 Make sure your Warmy credential is selected, then click Execute Step. In the output, find and copy the value of the id field — this is your Split ID.
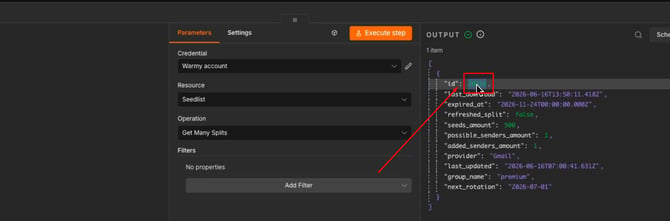
Step 6 — Create a HubSpot List
In HubSpot, go to CRM → Lists 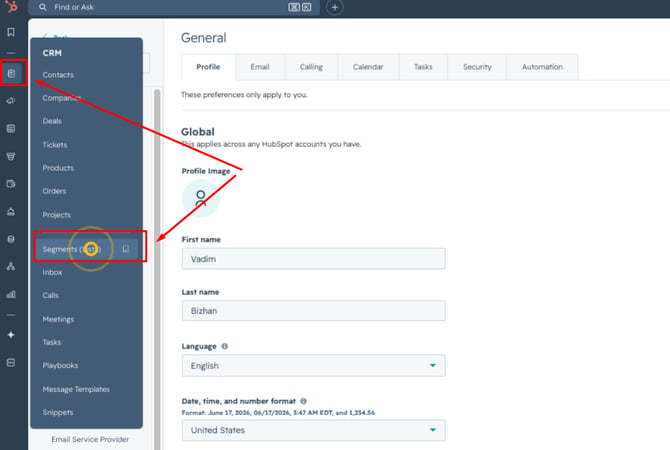 And create a new list. Select Contacts, then click Next. Choose Static List, give it a clear name (for example, "Seedlist"), and leave it empty — the workflow will populate it automatically.
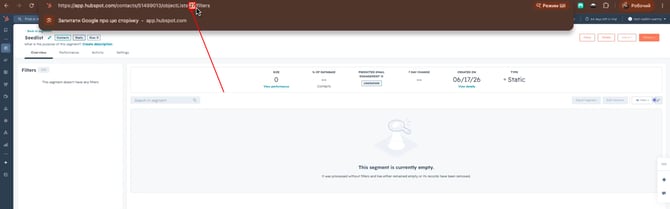
Once the list is created, copy its List ID from the URL. It will look like this:
app.hubspot.com/contacts/<portal-id>/objectLists/<LIST_ID>/filters
Step 7 — Map Your Split ID to the HubSpot List ID
Open the Set Workflow Global Variables node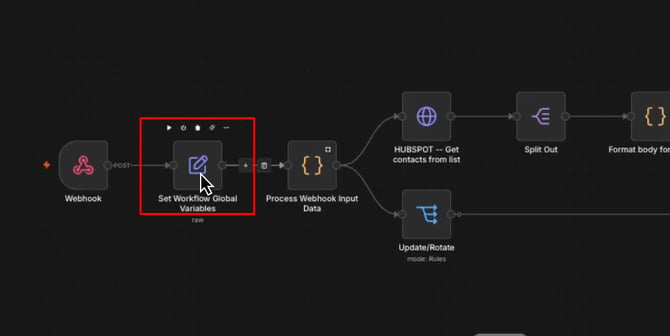 Using the IDs from the previous two steps, set the mapping in JSON format like this:
{
  "split_info": [
    {
      "split_id": "20316",
      "hubspot_list_id": "27"
    }
  ]
}
If you want to sync more than one seed list, add additional objects to the array — one per split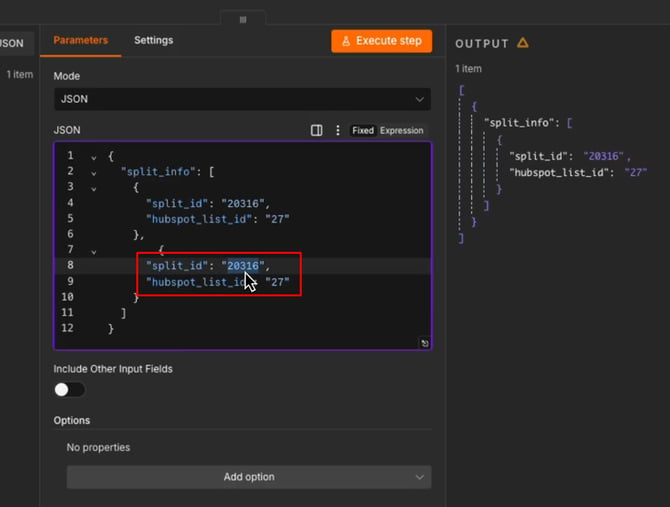 Click Save when done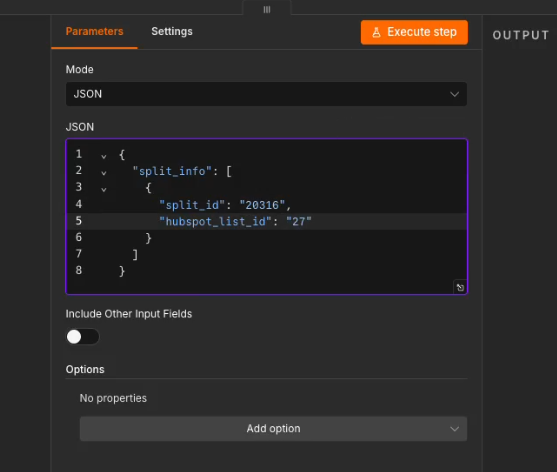
Step 8 — Populate the HubSpot List for the First Time
Since the HubSpot list is currently empty, you'll want to fill it manually before going live.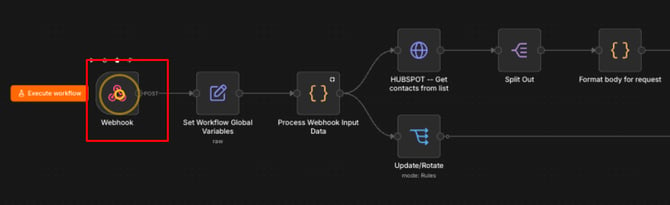
Open the Webhook node and switch to the Edit Output panel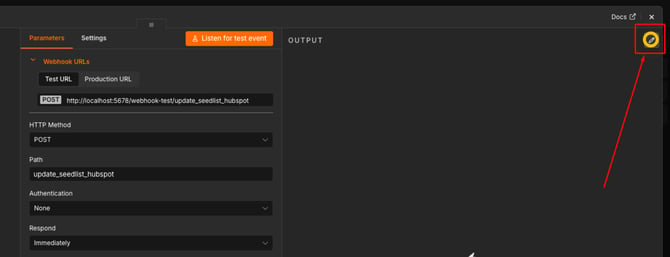 Clear output and paste the following example data and click Save
[{"body": {"affected_id": "YOUR_SPLIT_ID", "action_key": "seed_list_rotate"}}]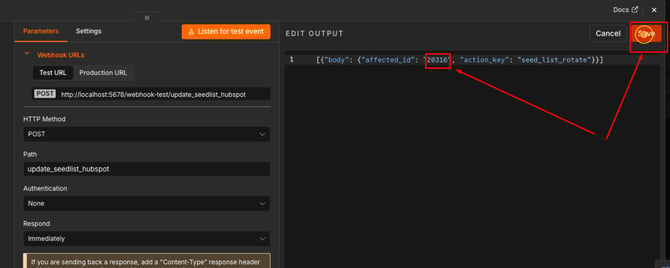 Add ID from the Split ID from Step 5, then click Execute Workflow. The workflow will read the emails from that split and push them into your HubSpot list.
Once complete, open the list in HubSpot — it should now contain all your seed contacts.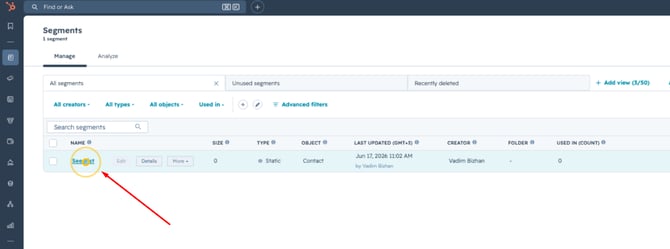
Remember: Unpin the Webhook data afterwards by clicking the pin icon again, so that live events from Warmy flow through normally.
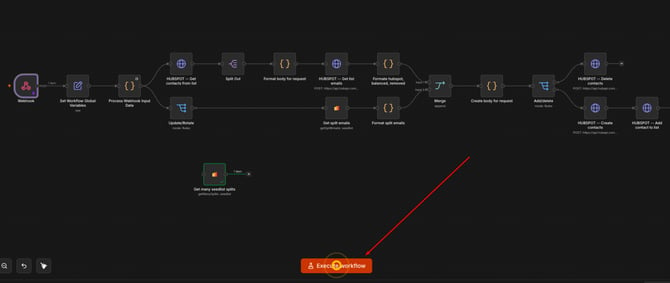
Step 9 — Connect the Webhook in Warmy
Open the Webhook node in n8n and switch to the Production URL tab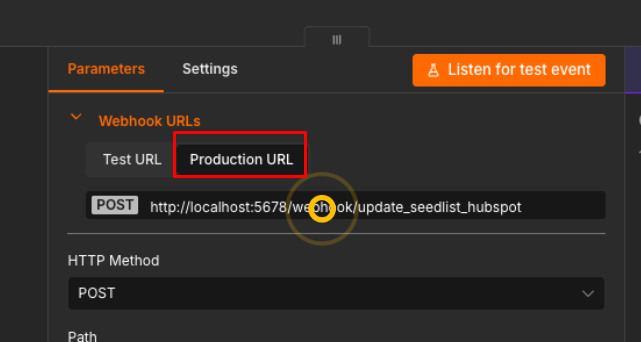
Copy the URL — it will look something like:
https://<your-n8n-host>/webhook/update_seedlist_hubspot
Now go to your Warmy account and open the Notification Hub. In the Webhooks channel, click + to add a new webhook. Paste the Production URL and click Save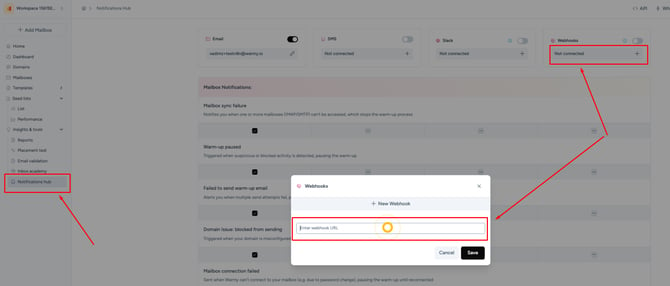
Enable the Webhook channel for these two notifications:
- Seed list has been updated
- Seed list has been rotated
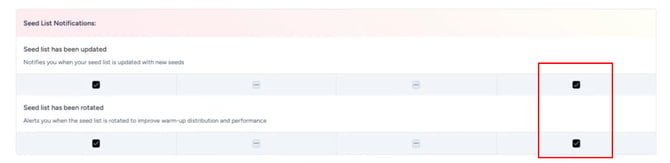
Warmy will now automatically notify your n8n workflow whenever your seed list changes.
Note: If you're running n8n locally for testing purposes, you can skip the webhook step for now and test the workflow manually instead.
Step 10 — Activate the Workflow
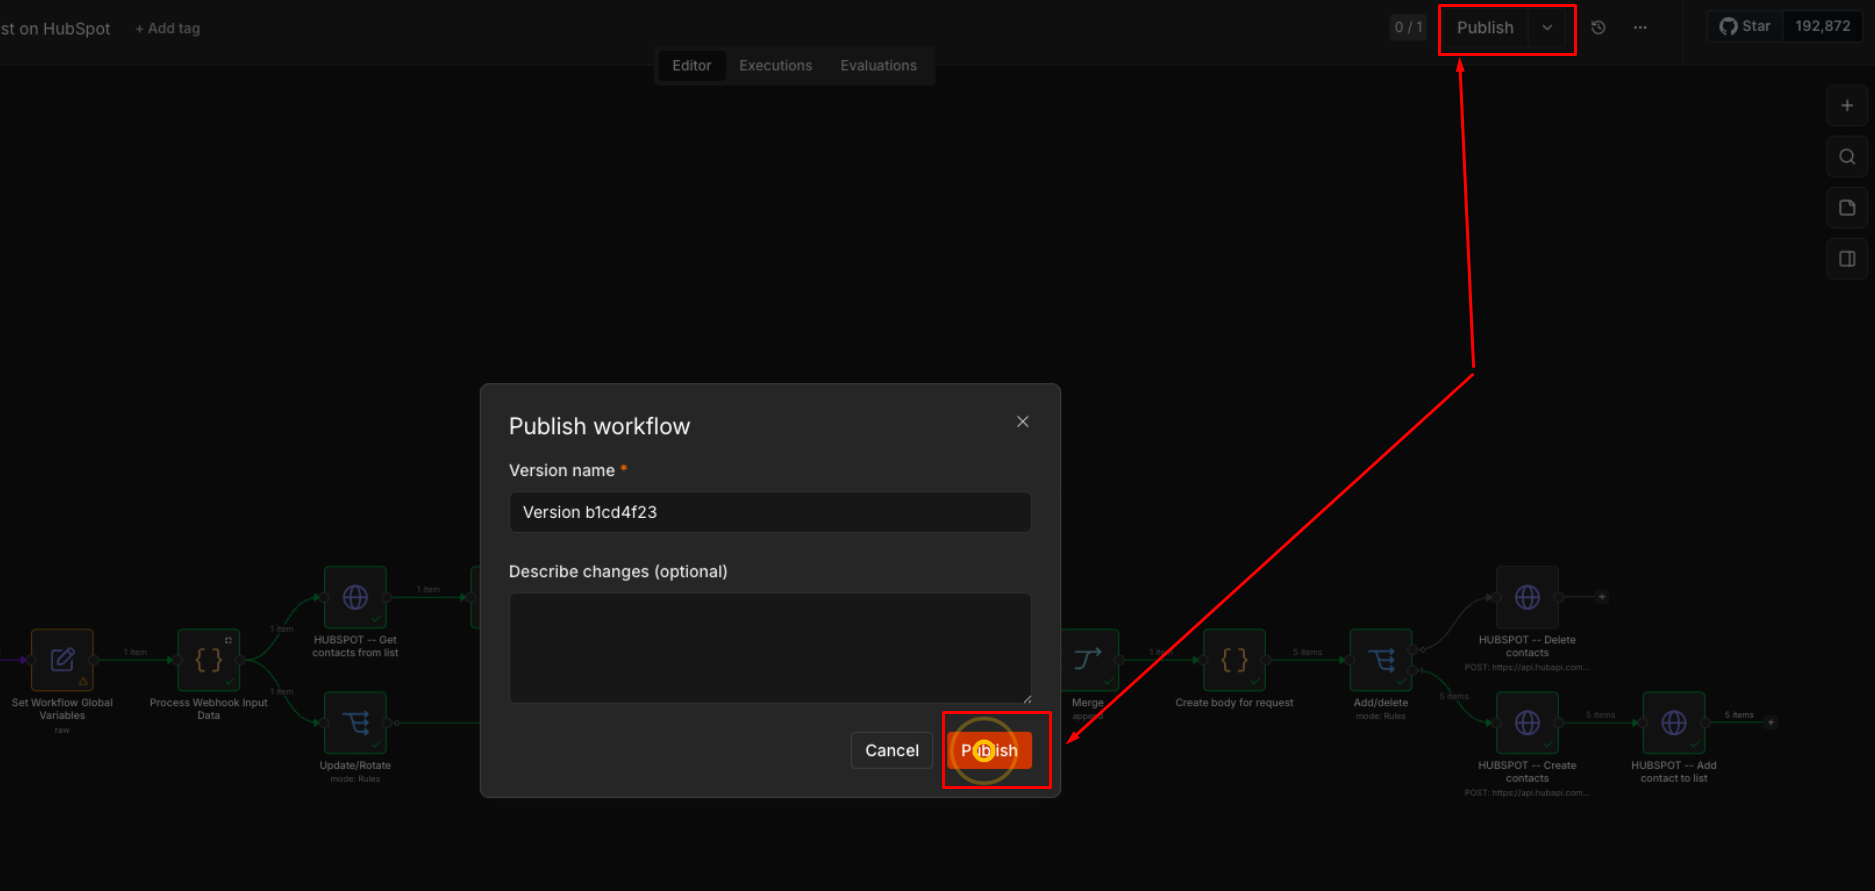
Once you've tested the workflow and confirmed everything is working correctly (look for green check marks on all nodes), activate it using the toggle in the top-right corner of n8n. From this point on, your HubSpot list will stay in sync with your Warmy seed list automatically. 🎉
Troubleshooting
| Symptom | Likely Cause | Fix |
|---|---|---|
| Warmy node fails to authenticate | Wrong API Token or Holder UID | Re-check Step 3 and confirm the API key toggle is enabled |
| HubSpot nodes return a permission error | Missing scope | Confirm all four scopes from Step 4 are added to the Service Key |
| Contacts are not added or removed | Split ID ↔ List ID mapping is wrong | Verify the values in the Set Workflow Global Variables node (Step 7) |
| Workflow never triggers | Webhook not connected or wrong URL | Re-add the Production URL in Warmy and enable both seed list notifications (Step 9) |
| Nothing happens on rotation only | "Seed list has been rotated" notification is off | Enable it for the Webhook channel in the Notification Hub |