![Group 1261151152.png]](https://support.warmy.io/hs-fs/hubfs/Group%201261151152.png?width=50&height=50&name=Group%201261151152.png)
How It Works
When you use Warmy's Seed List, you send emails from your Email Service Provider (ESP)—like HubSpot, Salesforce, or Klaviyo to Warmy's test seed accounts. Because those seed accounts include personal Gmail/Google addresses, Gmail calculates sender reputation and spam metrics for your domain as normal.
Connecting Google Postmaster to Warmy allows Warmy’s algorithm to pull that data directly to monitor your domain reputation in real-time alongside your Seed List tests.
What You Need to Set It Up
To get Google Postmaster connected to Warmy with a Seed List, ensure you complete the following steps:
- Verify Your Domain in Google Postmaster:
- Go to postmaster.google.com and add your sending domain.
- Add the provided TXT record to your DNS settings to prove domain ownership.
- Grant Access to Warmy:
- In Postmaster Tools, go to Manage Users for your domain and invite gpm@warmy.io (or the specific Google account Warmy prompts you to share access with).
- Check Your Warmy Plan:
- Ensure your Warmy subscription includes the Google Postmaster integration (usually included on Premium and higher plans; basic tiers may restrict GPM sync).
- Maintain Daily Sending Volume:
- Google Postmaster requires a minimum sending volume to personal Gmail accounts before it generates reputation graphs. Make sure you are regularly sending your Seed List campaign to trigger Gmail’s reporting threshold.
👀 Please take a look in the videos with the steps if you need any help 😎
Here is the step by step on how to do it.
Complete Setup Guide: Syncing Warmy Seed Lists with MailElement via n8n
This guide will walk you through integrating your Warmy seed lists with MailElement using n8n. We will cover list creation, Warmy configuration, n8n workflow mapping, and state tracking via data tables.
1. Create Contact Lists in MailElement
Prerequisite setup in the MailElement dashboard.
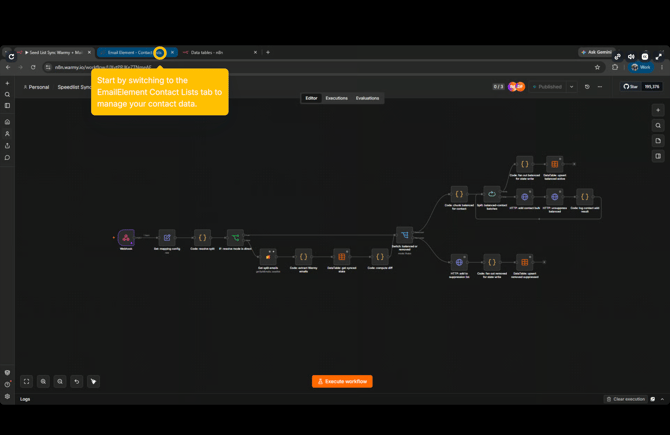
- Navigate to the Email Element - Contact Lists tab in your browser.
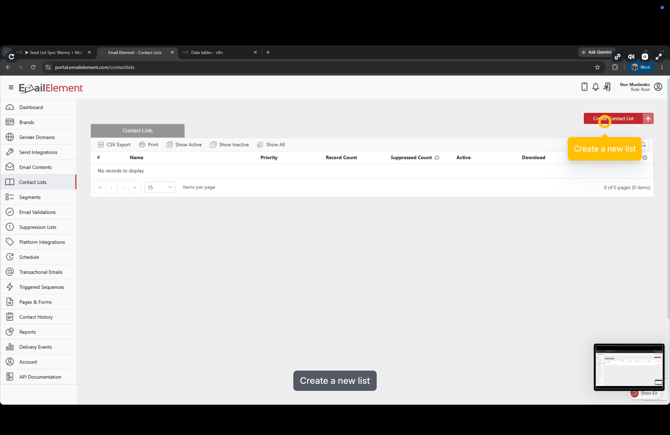
- Click the Create Contact List button in the upper right corner.
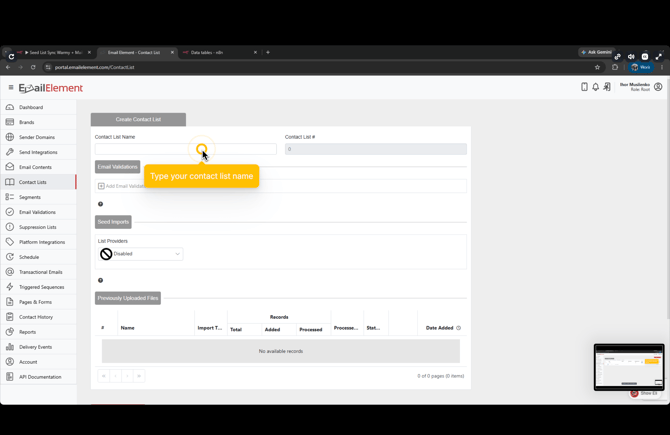
- Enter an identifiable name for your contact list (e.g., Seedlist_1) and click Create.
- Note the numeric ID assigned to the created list (e.g., 2677).
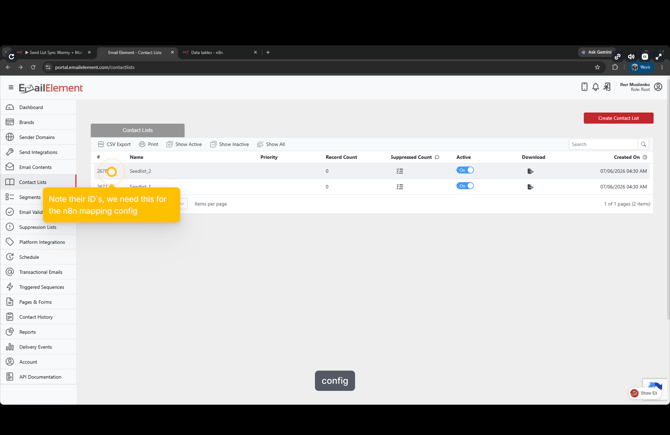
- (Optional) If syncing multiple seed lists, repeat the process to create additional lists (e.g., Seedlist_2) and record their respective IDs (e.g., 2678).
First, navigate to the Email Element - Contact Lists tab in your browser to start managing your contact data.
Click the Create Contact List button in the upper right corner.
Enter an identifiable name for your contact list (e.g., Seedlist_1).
Confirm your contact list details and click Create to store your new list in the system.
Be sure to note the numeric ID assigned to the created list (e.g., 2677). You will need this later for the n8n mapping config. (Optional: If syncing multiple seed lists, repeat this process to create additional lists).
2. Set Up a Global Suppression List
Handles removed or suppressed seed emails.
- In MailElement, navigate to Suppression Lists from the left navigation panel.
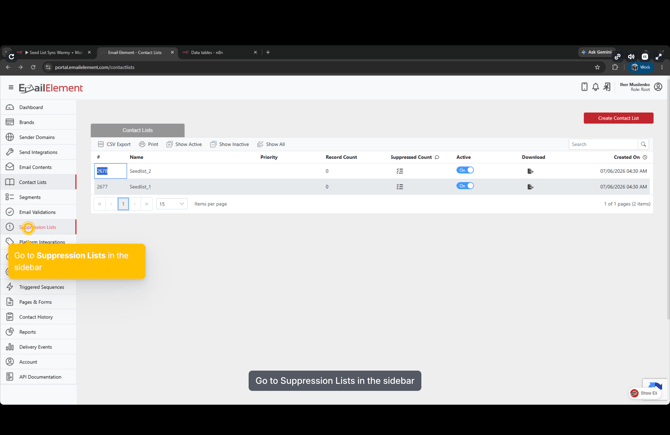
- Click Create Suppression List.
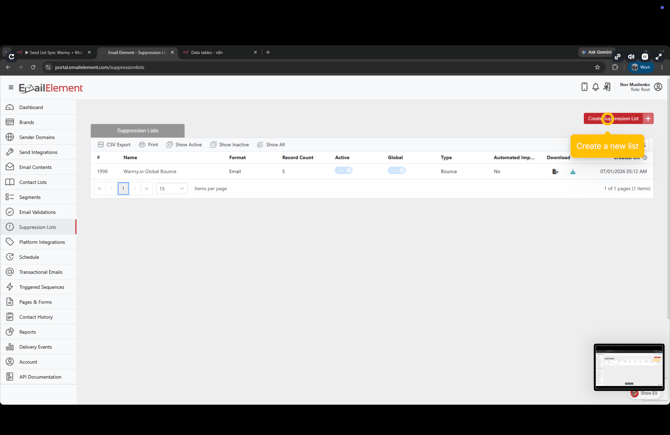
- Name the suppression list (e.g., Seedlist supp) and set the format to Email.
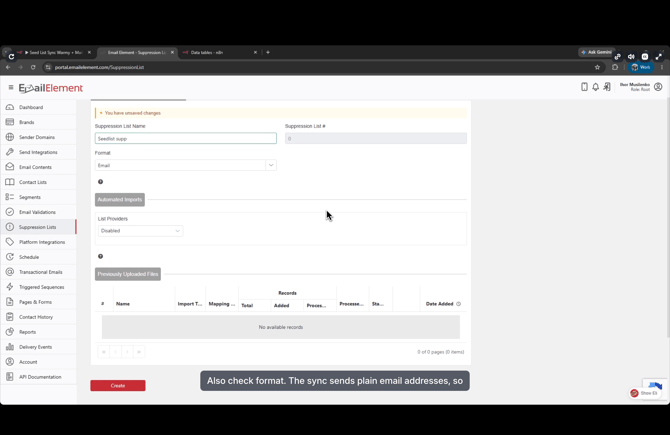
- Click Create to initialize the list.
- Toggle the Global switch to On so suppressed emails apply globally across all contact lists, then confirm the setting.
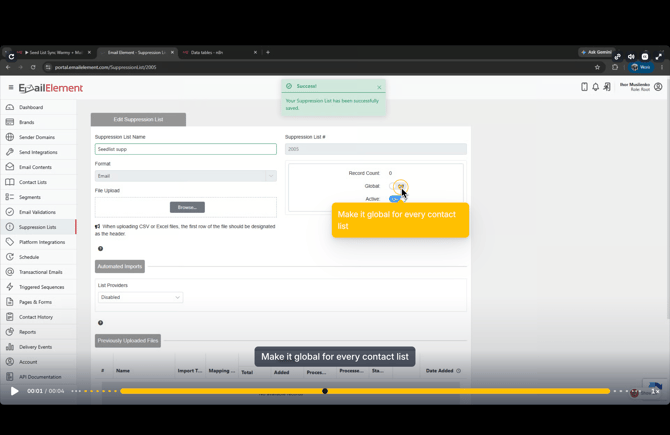
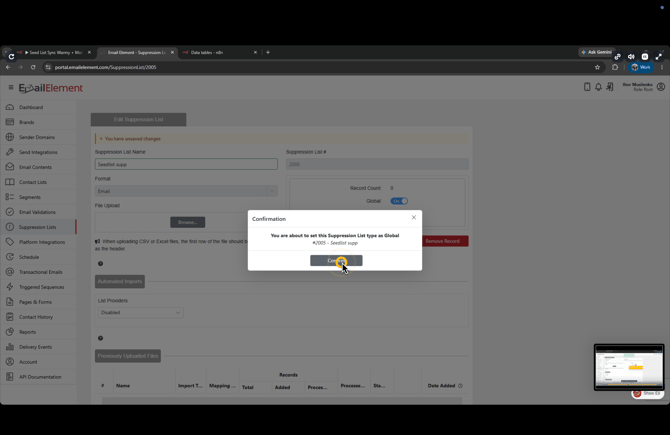
- Record the generated Suppression List # (e.g., 2005) for use in n8n
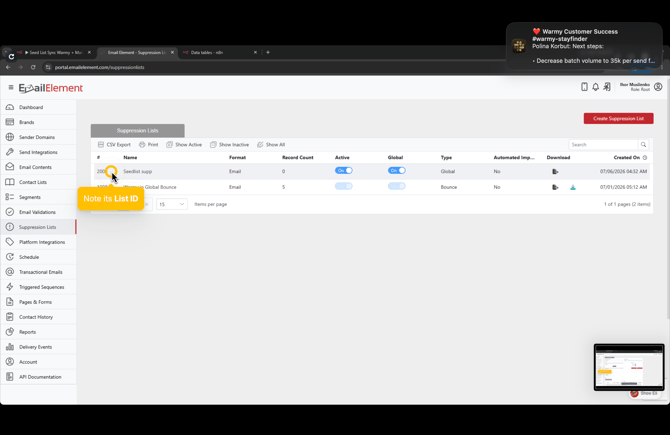
In MailElement, go to Suppression Lists from the left sidebar navigation panel.
Click Create Suppression List, name it (e.g., Seedlist supp), set the format to Email, and initialize the list.
Toggle the Global switch to On so that suppressed emails apply globally across every contact list, then save/confirm the setting.
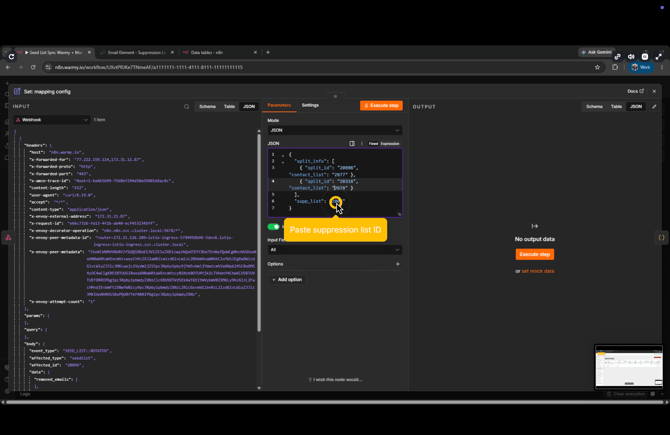
Record the generated Suppression List ID (e.g., 2005) to use later in n8n.
3. Configure Webhooks and Notifications in Warmy
Links Warmy event triggers to n8n.
- In n8n, open the Webhook node on your workflow canvas.
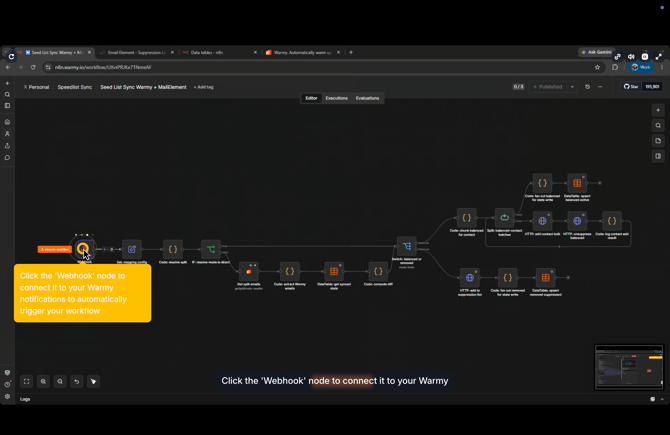
- Select the Production URL tab and copy the webhook endpoint URL.
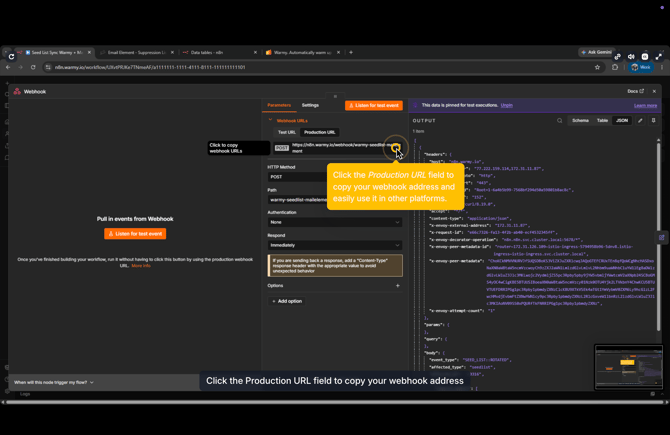
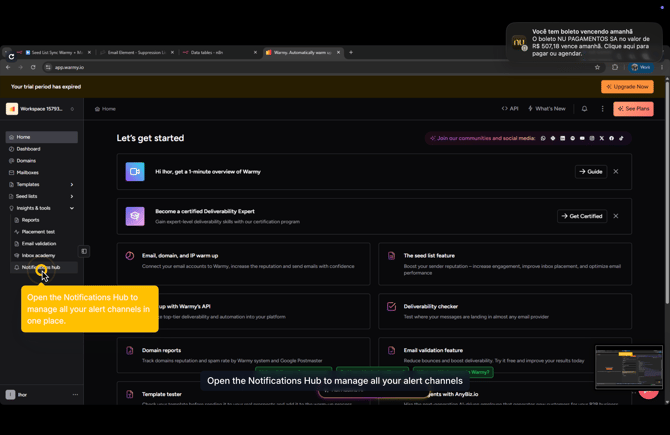
- Open the Warmy web app and navigate to Insights & tools > Notifications hub.
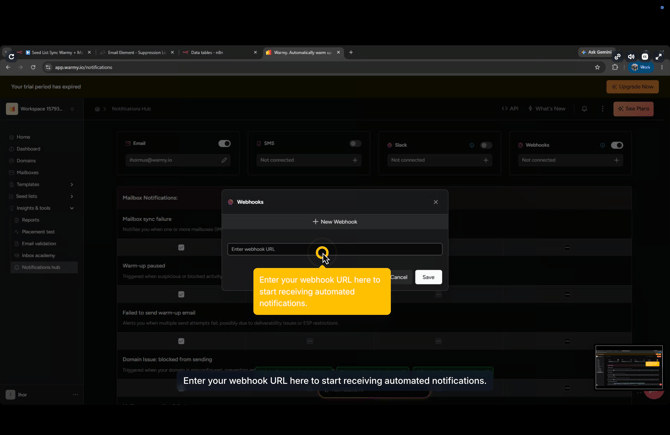
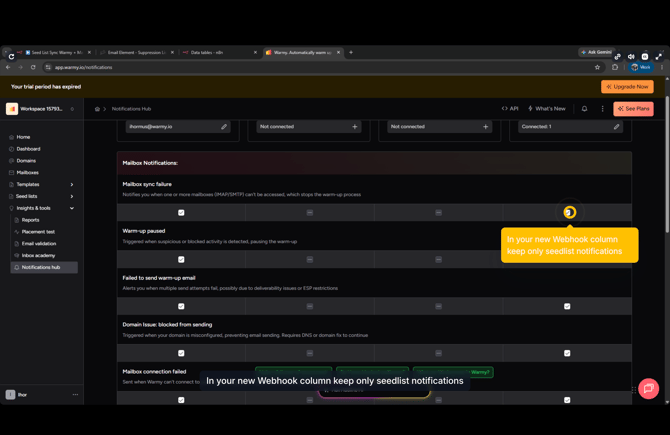
- Under your Webhook settings, ensure only seed list notifications are kept active (e.g., Seed list has been updated with new seeds, Seed list has been rotated) to prevent unnecessary payload triggers.
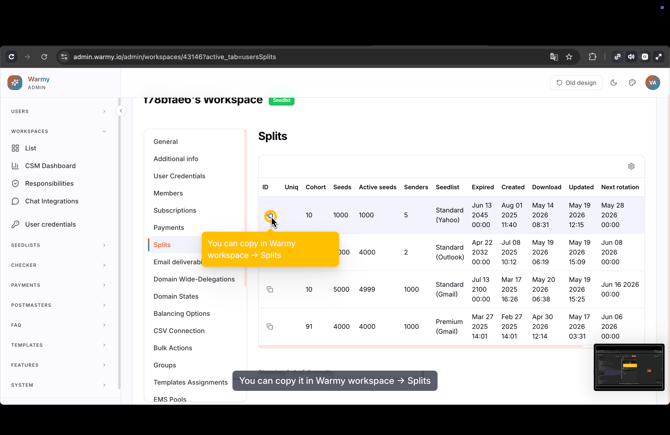
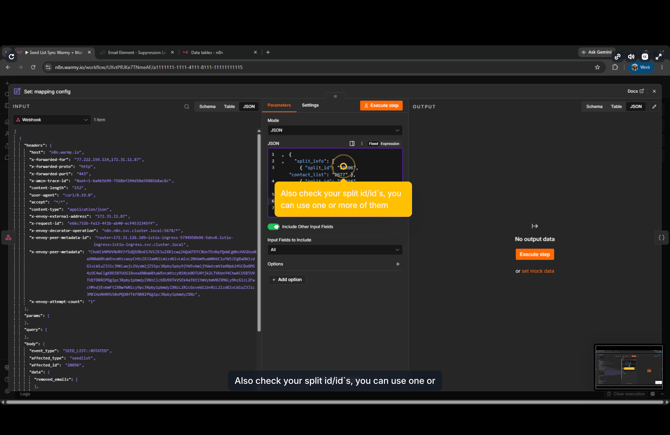
- Retrieve your split IDs directly from Warmy Workspace > Splits for mapping.
4. Map Configurations in n8n
Link Warmy splits to MailElement lists.
- Return to n8n and open the Set: mapping config node.
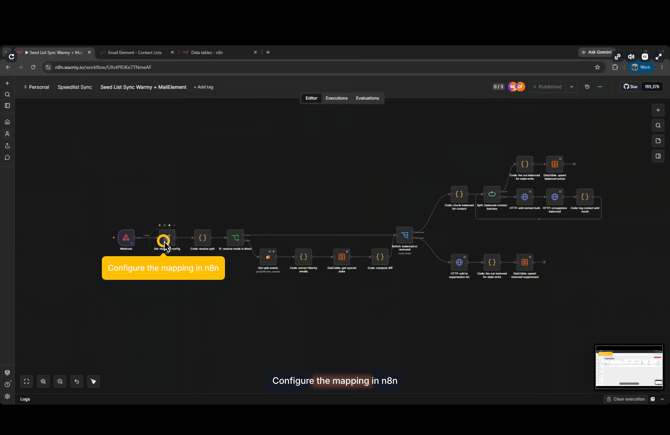
- Under the JSON configuration parameter, define your split_info mapping each split_id to its corresponding MailElement.
- Paste your recorded suppression list ID into the supp_list parameter.
Once the mapping config is complete, you can safely close this node.
5. Configure Credentials and API Authentication
Grants n8n write access to Warmy and MailElement.
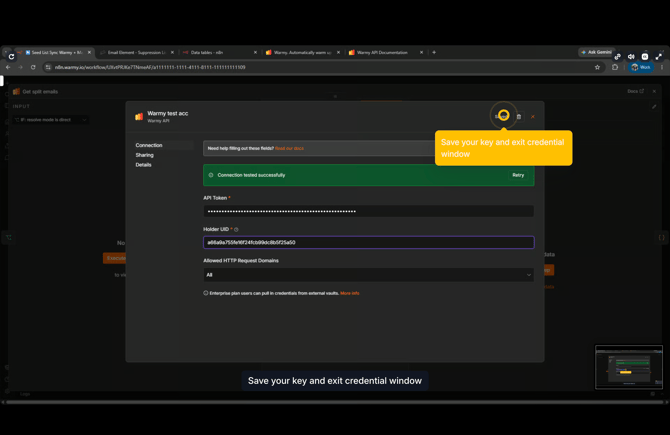
- Open the Get split emails node in n8n.
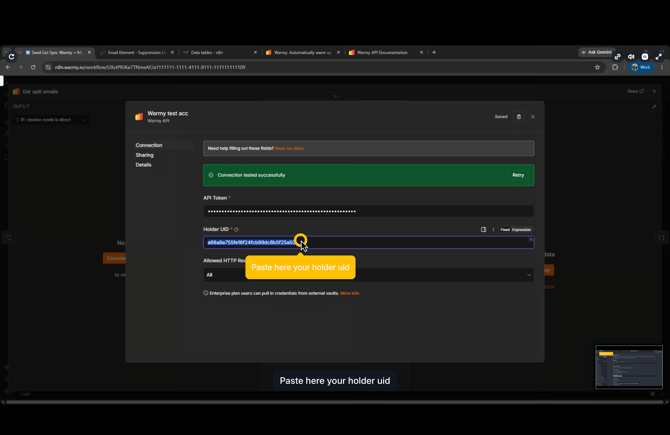
- Open the credentials window for Warmy.
- Input your API Token and paste your Holder UID.
- Save the credential and exit the window.
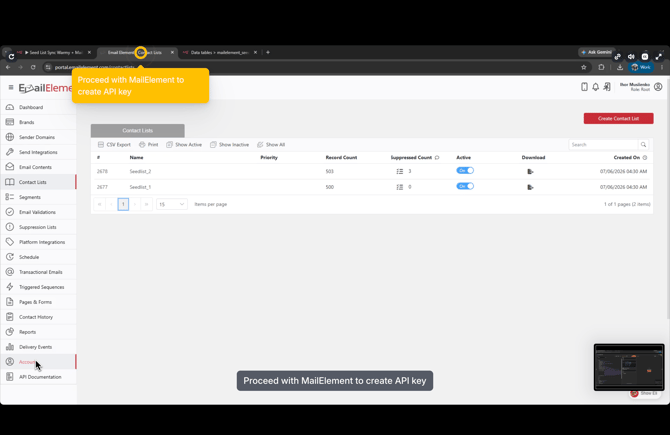
- Open MailElement in your browser, go to Account > API Documentation or API Keys, generate a new API key, and paste it into the respective MailElement HTTP nodes in n8n.
6. Set Up n8n Data Tables for Local State Tracking
Necessary since MailElement lacks state readback APIs.
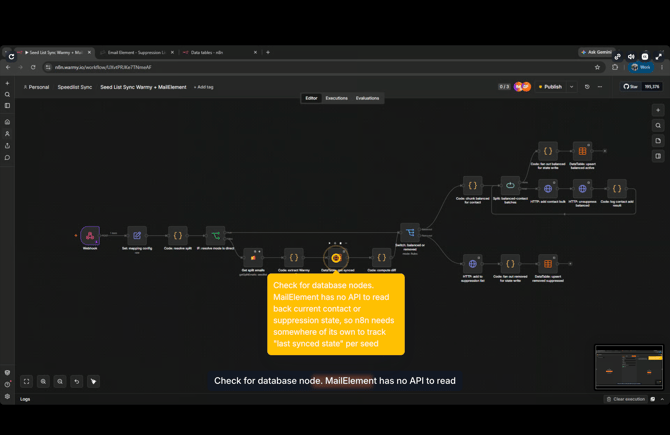
- MailElement has no API to read back current contact or suppression state, so n8n requires its own database table to track the "last synced state" per seed.
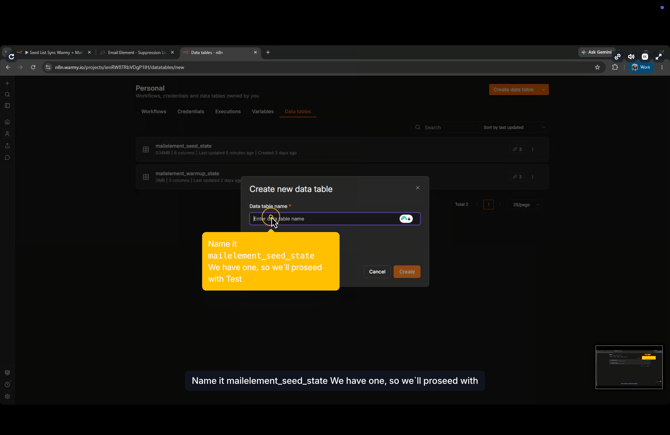
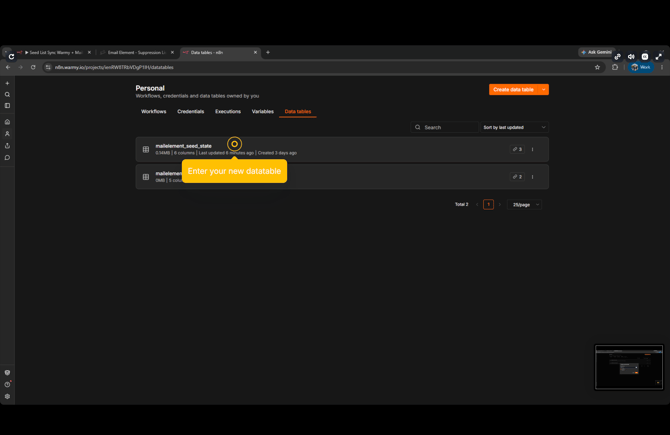
- Go to n8n > Data Tables and click Create data table.
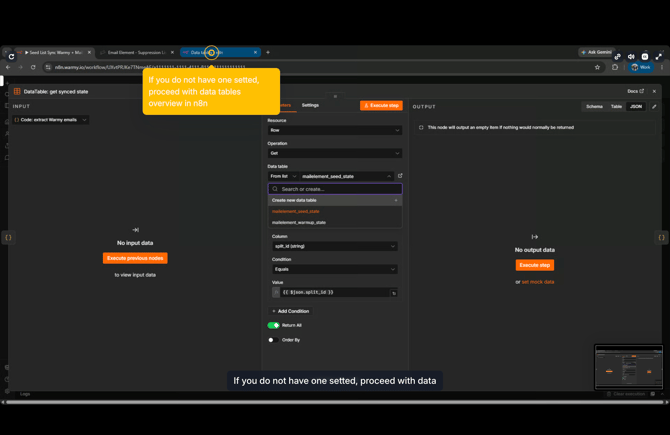
- Name the data table mailelement_seed_state
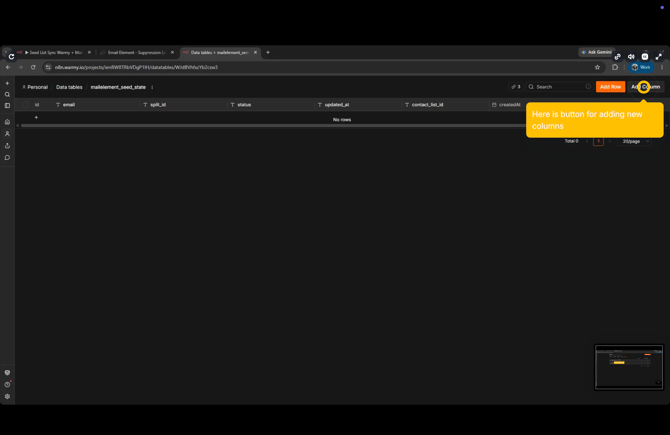
- Add required tracking columns using the Add Column button: email (Text), status (Text), updated_at (Text/Date), contact_list_id (Text).
7. Link Data Tables to Workflow Nodes
Connects n8n DataTable nodes to state tracking.
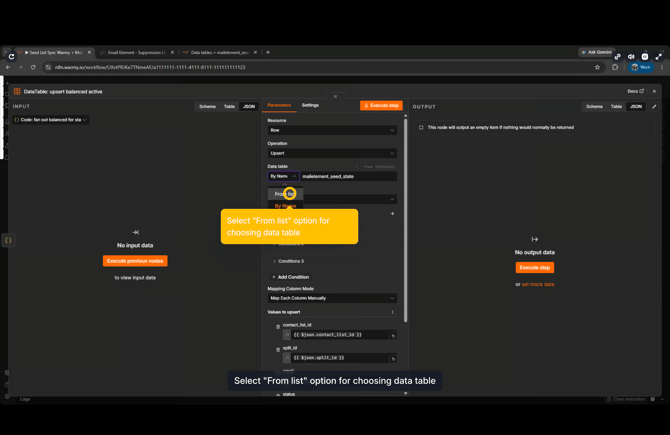
- Open the DataTable: get synced state node in your n8n workflow canvas.
- Under Data Table, select From list and pick mailelement_seed_state
- Ensure condition matching is set to match on split_id equals
- Repeat this step for the remaining DataTable nodes across both branches of your workflow: DataTable: upsert balanced active, DataTable: upsert removed suppressed.
- Save your node configurations.
8. Final Verification and Workflow Activation
Validates mapping and publishes workflow.
- Double-check your Set: mapping config node to verify all split_id values match your active Warmy splits.
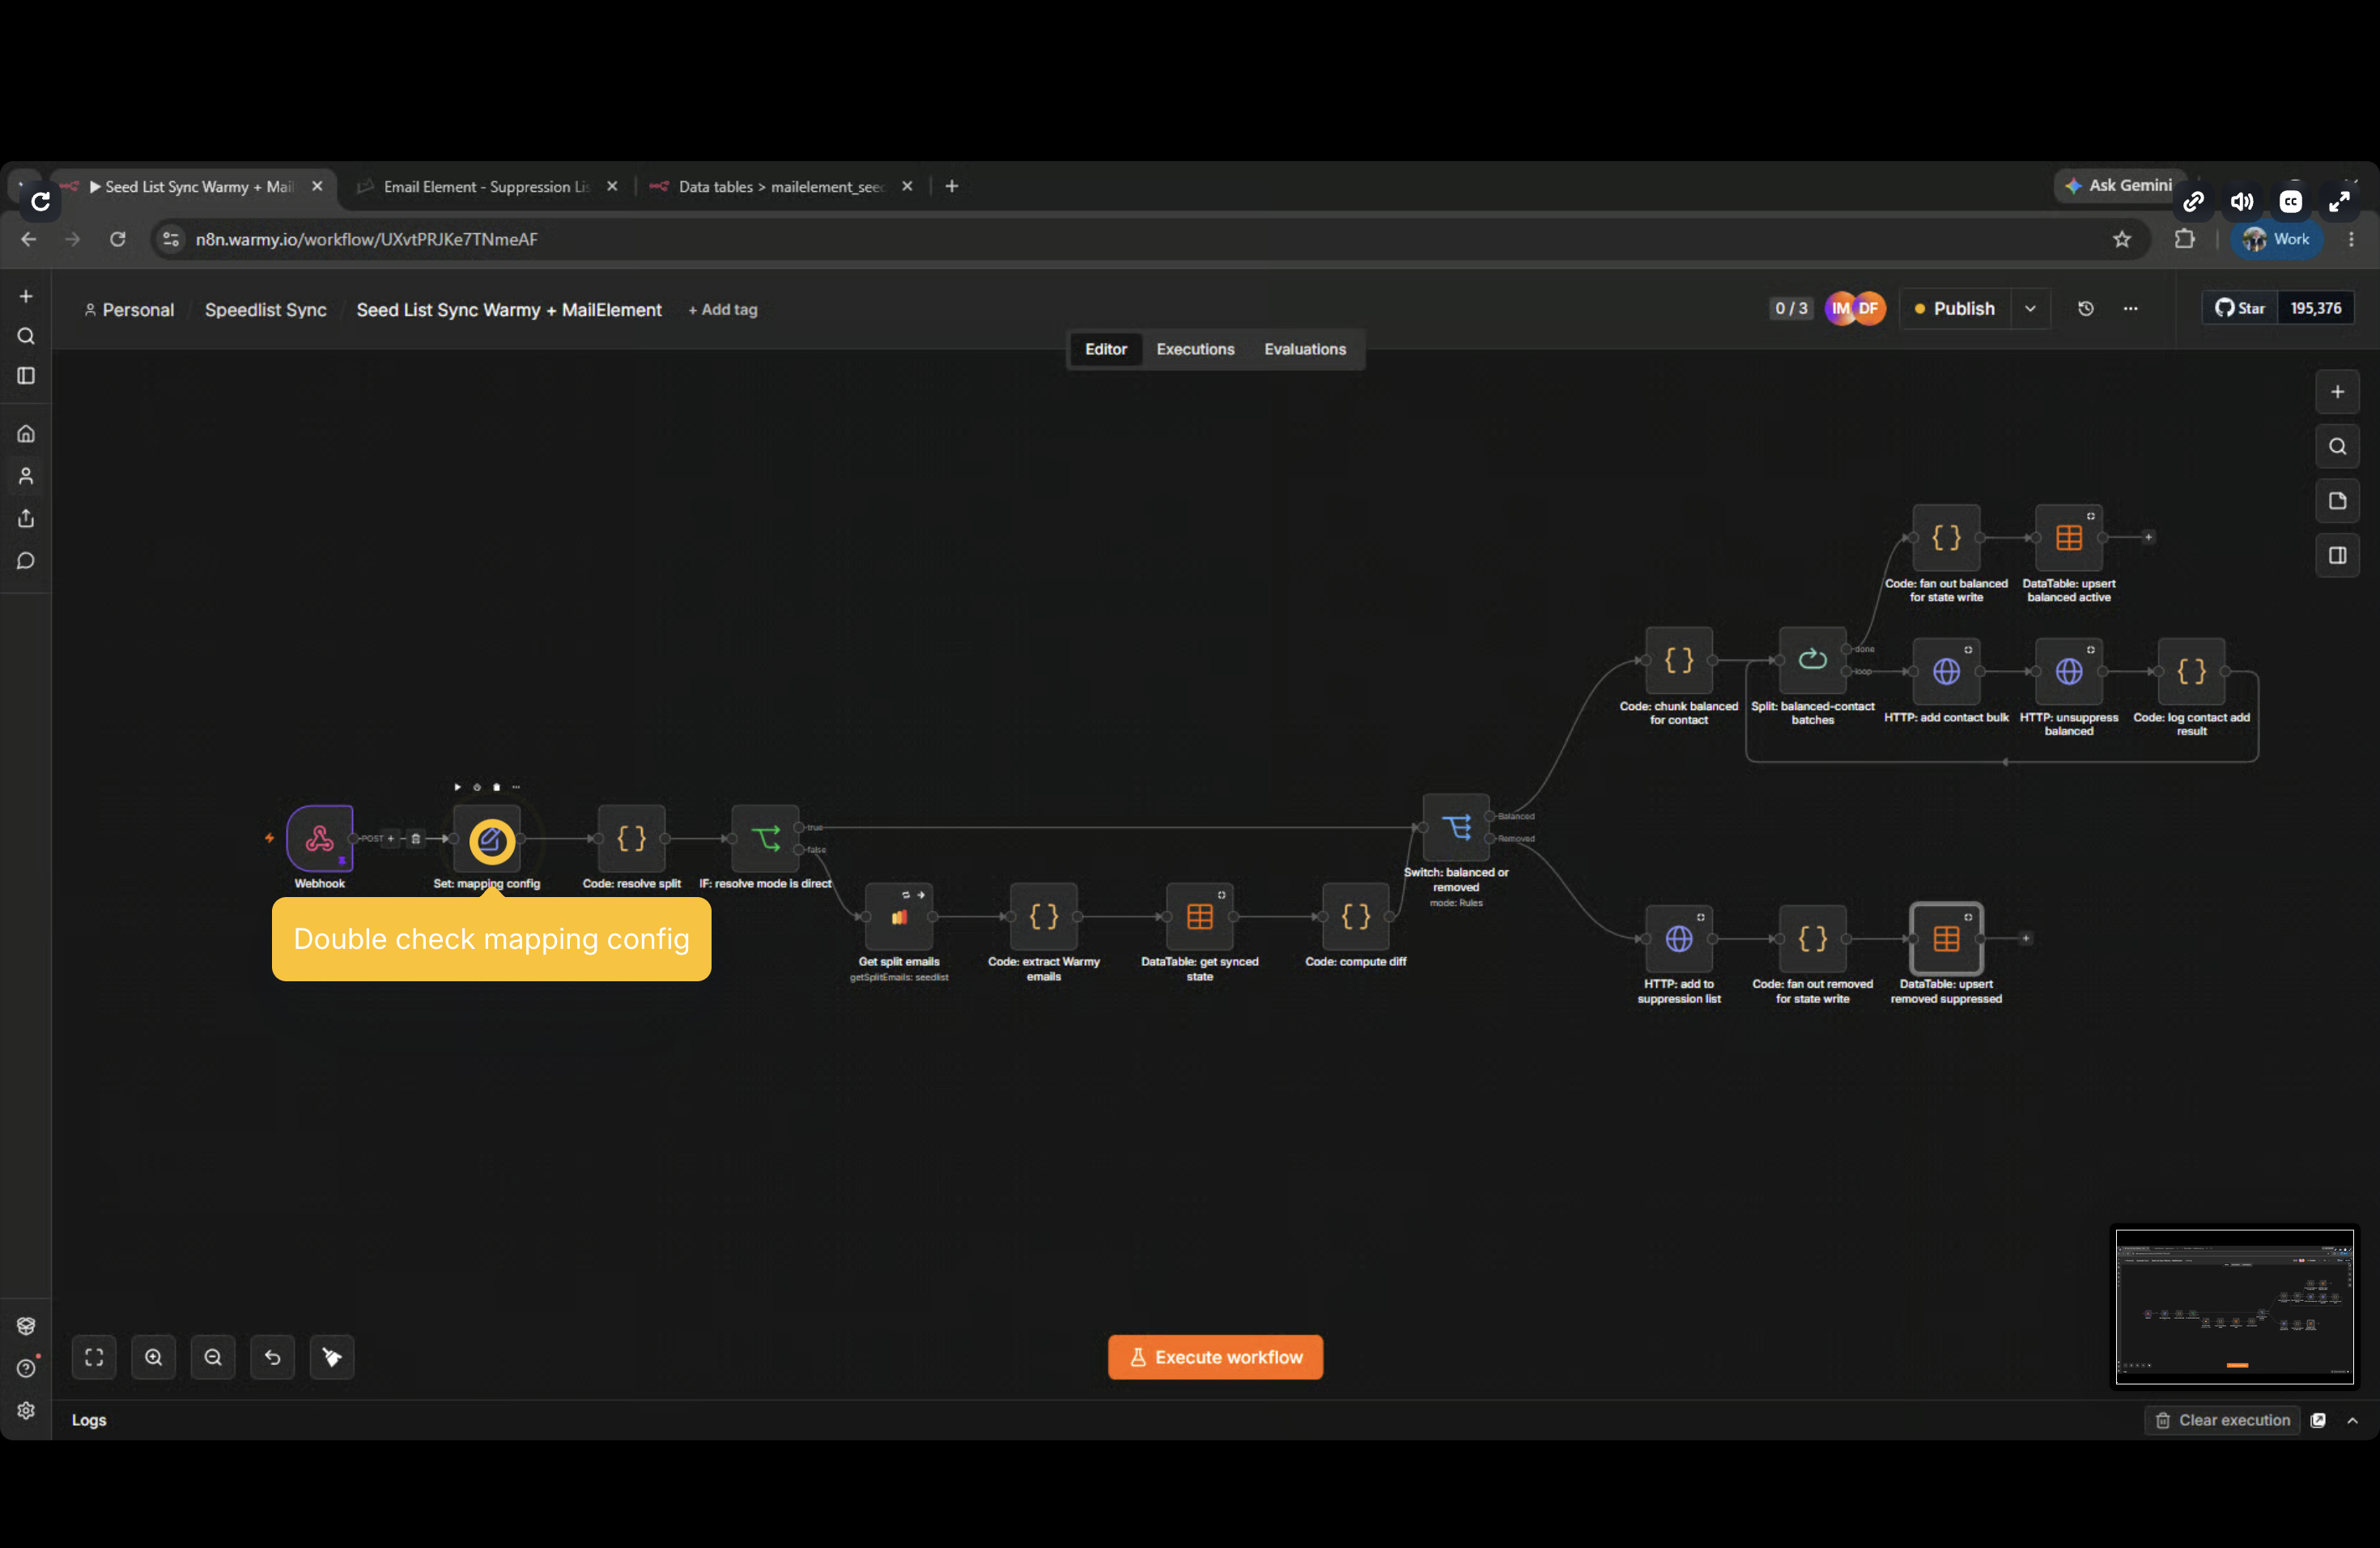
- Toggle the workflow status in the top right header from inactive to Publish / Active.