![Group 1261151152.png]](https://support.warmy.io/hs-fs/hubfs/Group%201261151152.png?width=50&height=50&name=Group%201261151152.png)
🎧 Prefer to listen? Hit play to hear this article read aloud.
Step 1: Create Amazon SES and Verify Your Domain.
Before connecting Amazon SES to Warmy.io, it's important to configure SPF and DKIM to achieve the right domain warmup. First, let’s observe the current settings in our Amazon SES portal and evaluate the steps needed to achieve SPF & DKIM authentication.
SPF and DKIM Status
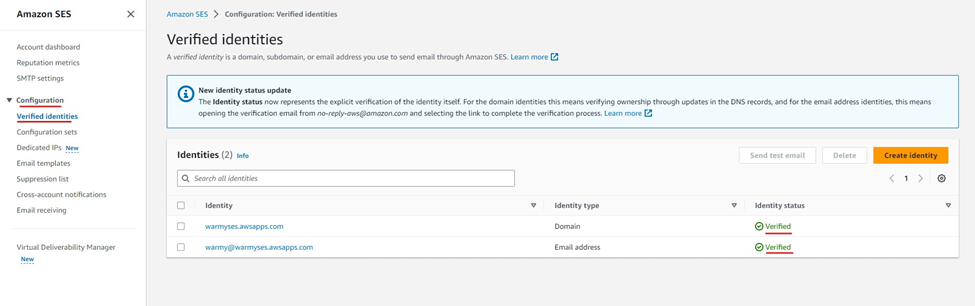
1. In the Configuration > Verified Identities section, you can check the current status of DKIM Signing and MAIL FROM Domain:-
DKIM Signing Status: n/a or Off – This states that a customized DKIM Signature is not in place for Amazon SES. This will invalidate and mark DKIM as a Fail.
-
MAIL FROM Domain Status: amazonses.com – This states that the Return-Path domain being used is amazonses.com and not our customized domain. This will invalidate and mark SPF as a Fail.

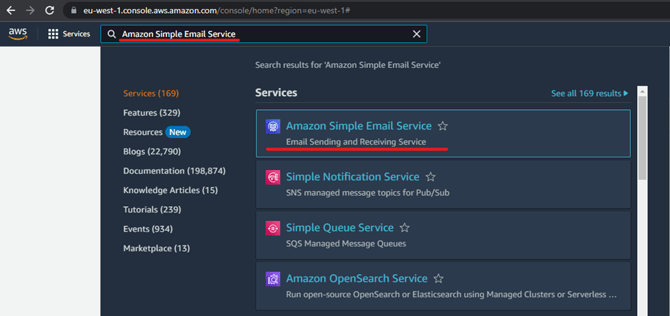
2. At the top of the screen, select Amazon SES (Amazon Simple Email Service).
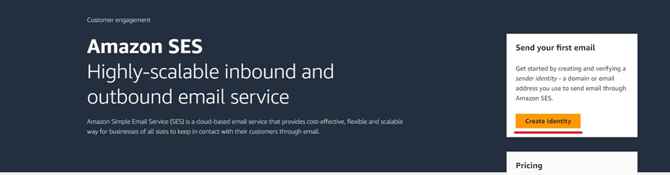
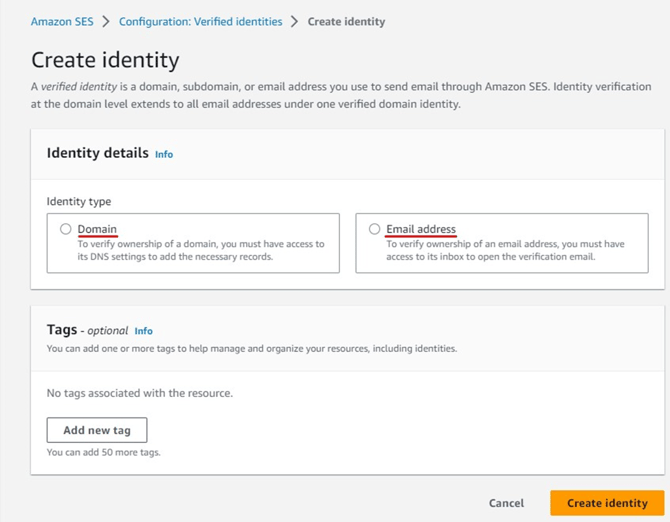
3 Click the Create Identity button and follow the on-screen instructions to create your Amazon SES object.
4. Following the instructions, connect your domain or email address to Amazon SES.
Generate DKIM Records
1. After clicking Create Identity, please head to Authentication on the Verified Identities page. Amazon SES will provide 3 CNAME Records for DKIM Settings. The next step is to implement these CNAME Records in our DNS Zone.
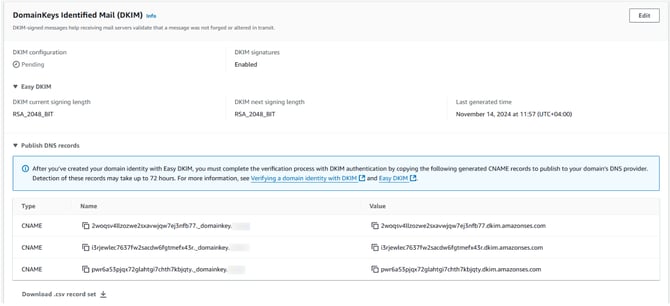
2. After adding all the CNAME Records, if everything is set up correctly, the green “Successful” banners will show up in the DKIM configuration. However, detection of these records may take up to 72 hours.

Setting Up Custom MAIL FROM Domain
1. Setting a customized MAIL FROM Domain will let you achieve SPF Alignment and pass results. From your Verified Identities page, you need to head to Set MAIL FROM Domain, click on Edit, and choose any given subdomain name for the setup process. For example, it would seem as “subdomain.domain.com.”

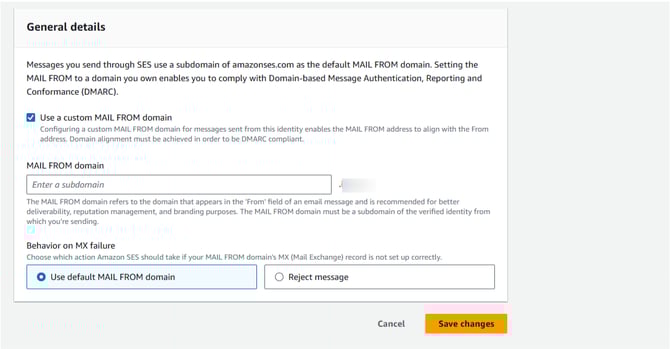
2. Amazon SES will provide you with one TXT record and one MX record, which you need to add to your DNS zone.
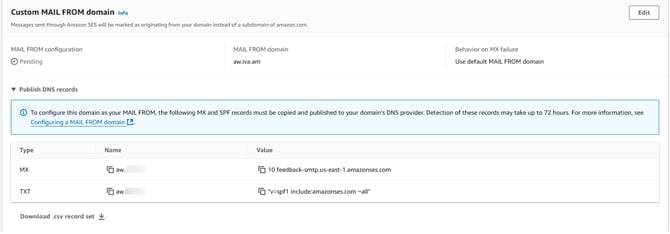
3. If everything is set up correctly, the green “Successful” banner will show up.

If you add an email address, you will receive a verification email to that address. Click the link in the email to verify your address.
Step 2: Generate SMTP credentials
- Go to the Amazon SES console.
- Go to the Verified Identities page and check if everything has been verified.
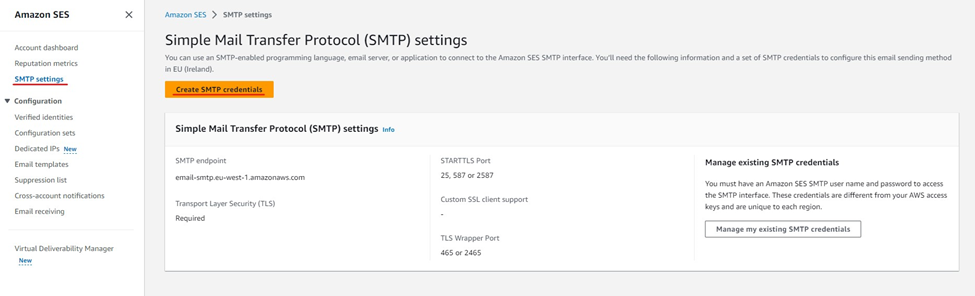
- Go to SMTP Settings tab.
- Click Create SMTP Credentials button and follow the on-screen instructions.
- In the IAM User Name field, enter a name for the SMTP credentials, for example [ IAM User Name: [ ses-smtp-user-warmy ] ].
- Click the Create button.
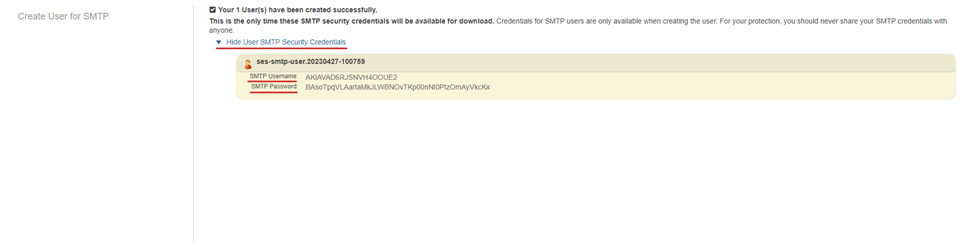
- After the SMTP credentials have been created, you will see the Show User SMTP Security Credentials text. Click on this text to view the SMTP endpoint address and credentials.
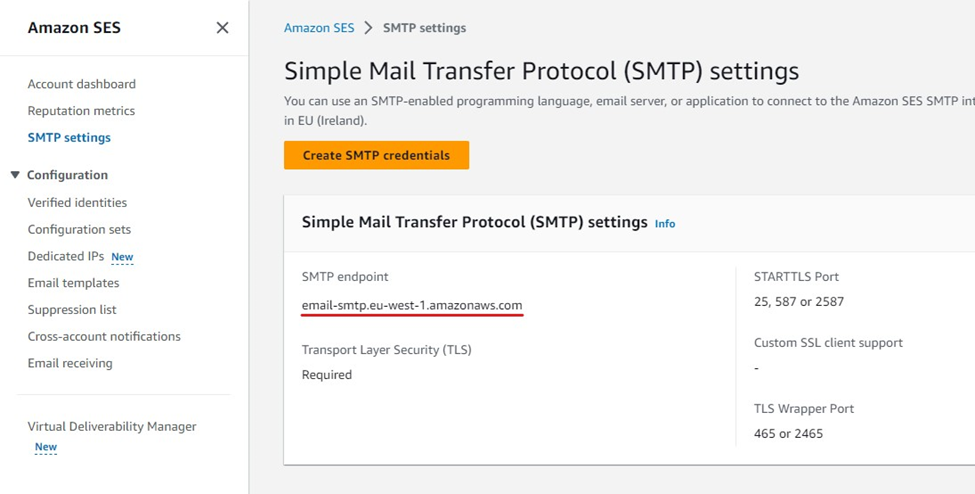
- After that, return to the </Amazon SES → SMTP settings/> tab and save the data you can see in Simple Mail Transfer Protocol (SMTP) settings → SMTP endpoint → </ email-smtp.eu-west-1.amazonaws.com />
Step 3: Connect your Amazon SES mailbox to Warmy
- Go to the Warmy dashboard.
- Click Add Mailbox

- In the email providers section, just scroll it down and click the Amazon SES option.

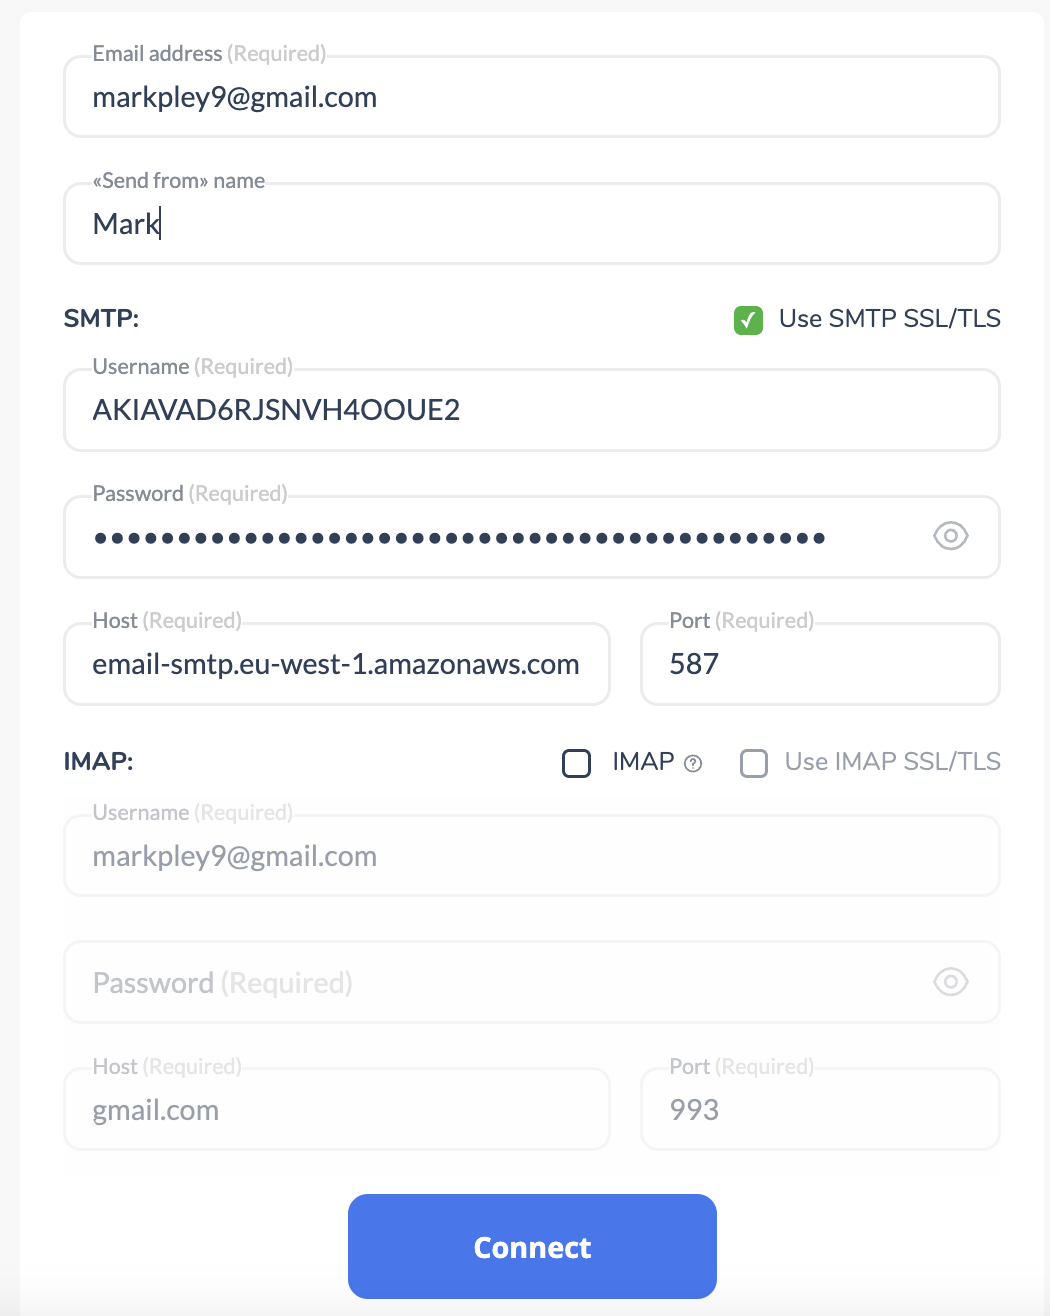
- In the Email Address field, enter the email address that you added to Amazon SES and passed the verification.
- In the "Send from" Name field, enter the name of the sender.
- In the SMTP Username field, enter the SMTP username that you saved earlier.
- In the SMTP Password field, enter the SMTP password that you saved earlier.
- In the SMTP Host field, enter the SMTP host that you saved earlier.
You can also connect your mailbox to IMAP to receive and handle incoming e-mails (this will be good for warming up).
10. In the IMAP section, enter the following information:
- IMAP Username: The username for your mailbox. This would be the email address that you added to Amazon SES and passed the verification.
- IMAP Password: If you are using a Gmail mailbox, you will need to generate an application password to use in this field. You can generate an application password in your Gmail settings. If you are using a different mailbox provider, you can simply enter the password for your mailbox.
- IMAP Host: The IMAP host for your mailbox. In your case, this would be "imap.gmail.com."
- IMAP Port: The IMAP port for your mailbox. This is typically 993.
11. Click the Connect button.

Once you've followed these steps, your Amazon SES mailbox will be connected to Warmy, and you can start warming up! 🥳