![Group 1261151152.png]](https://support.warmy.io/hs-fs/hubfs/Group%201261151152.png?width=50&height=50&name=Group%201261151152.png)
🎧 Prefer to listen? Hit play to hear this article read aloud.
Setting up Domain Authentication in SendGrid automatically configures your DKIM and SPF records. This process proves to inbox providers that you own the domain and that SendGrid is authorized to send emails on your behalf.
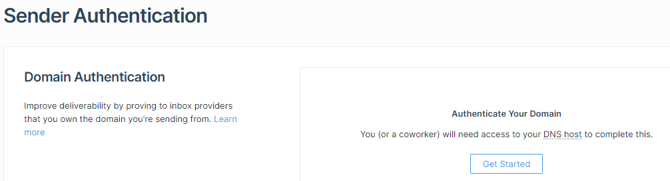
Step 1: Start Domain Authentication
-
Log in to your SendGrid account.
-
Navigate to Settings > Sender Authentication.
-
In the Domain Authentication section, click Authenticate Your Domain.
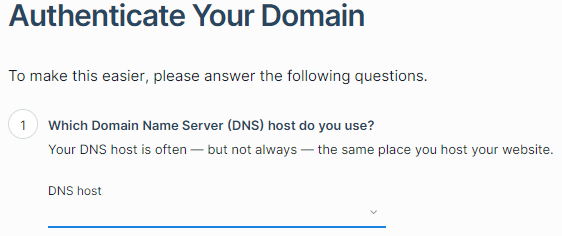
Step 2: Select Your DNS Host
-
Choose your DNS host (e.g., Cloudflare, AWS, Namecheap) from the provided list.
-
Select whether you want SendGrid to rewrite tracking links to use your domain.
-
Click Next.
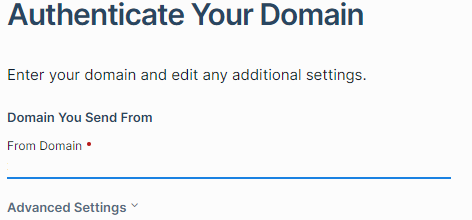
Step 3: Enter Your Domain
-
Enter the root domain you will use to send emails (e.g.,
yourdomain.com).
-
Click Next. SendGrid will generate a set of DNS records. By default, SendGrid uses automated security, which provides CNAME records instead of traditional TXT records to handle both SPF and DKIM automatically.
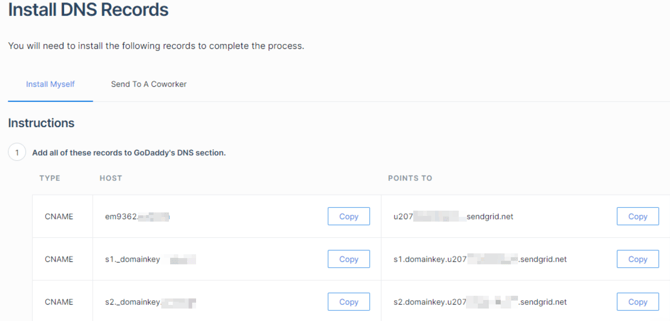
Step 4: Add Records to Your DNS Provider
-
Log in to your DNS provider's control panel in a separate tab.
-
Navigate to your DNS settings or Zone Editor.
-
Create new records based on the exact values SendGrid generated. Copy and paste the Type (CNAME), Host(Name), and Value (Target) for each record. Sample CNAME records in Cloudflare DNS:

Step 5: Verify the Configuration
-
Return to the SendGrid dashboard.
-
Check the box labeled I've added these records.
-
Click Verify.
-
If the DNS changes have propagated, you will see a "It worked!" success message. If it fails, wait 15-30 minutes and try verifying again, as DNS updates can take time.