---
title: Mailchimp + Zapier Seed List Automation
description: Automate and Filter Mailchimp Seedlist Contacts with Zapier
---
[Skip to content](https://support.warmy.io/knowledge/mailchimp-zapier-seed-list-automation#main-content)
English
Show submenu for translations
![Group 1261151152.png\]](https://support.warmy.io/hs-fs/hubfs/Group%201261151152.png?width=50&height=50&name=Group%201261151152.png)
Open main navigation
Close main navigation
- English
Show submenu for translations
- [Go to warmy.io](https://www.warmy.io/)
[Go to warmy.io](https://www.warmy.io/)
Hey there Warmer! How can we help? 🙏
- There are no suggestions because the search field is empty.
1. [Help Center](https://support.warmy.io/knowledge?hsLang=en)
2. [Integrations](https://support.warmy.io/knowledge/integrations?hsLang=en)
3. [Seed List Automations](https://support.warmy.io/knowledge/integrations?hsLang=en#seed-list-automations)
# Mailchimp + Zapier Seed List Automation
## Learn how to automate seedlist email updates and rotation in Mailchimp using Zapier. Discover how to filter seedlist contacts by tags for easier organization and targeted campaigns.
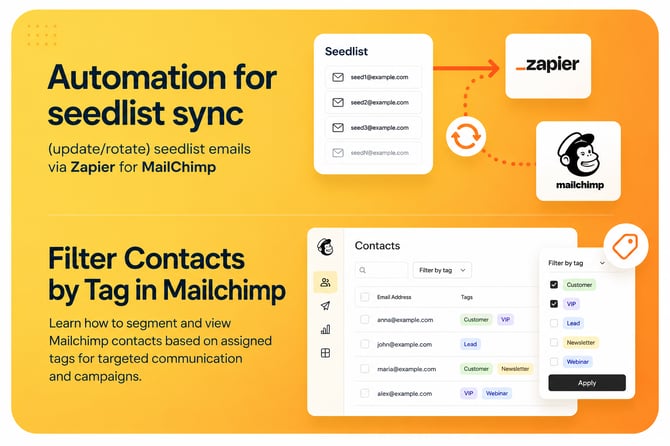
#### **👀 Please take a look in the video with the steps if you need any help 😎**
---
### **How to Filter Mailchimp Contacts by Tag Using Zapier and Warmy**
#### **Introduction**
You can use Zapier to connect Mailchimp with Warmy and automatically manage the contacts used in your email warm-up process.
In this workflow, Mailchimp tags identify the contacts you want to use for warm-up. Zapier then rotates these contacts and increases the contact count over time based on the growth rate you configure.
Follow the steps below to set up the workflow and test it before publishing your Zap.
---
#### **Configure the Zapier Schedule**
Start by setting when your automation should run.
1\. Open your Zapier automation project.
2\. Open **Schedule by Zapier**, which should be the first step in your Zap.
3\. Set **Time of Day** to the time you want the automation to run, such as **8:00 AM**.
4\. Choose whether you want the Zap to **Trigger on weekends**.
5\. Set **Timezone Override** if you want the schedule to use a specific timezone, such as **Europe/Berlin**.
6\. Click **Continue**.
**Tip:** Choose a time when your Mailchimp and Warmy workflows are ready to process contacts.
---
#### **Open the JavaScript Code Step**
Next, open the step that handles the contact rotation.
1\. Find **Code by Zapier** in your Zap.
2\. Click the **three dots** icon to open **More Options**.
3\. Open the **Run JavaScript** configuration.
4\. You should see the **Input Data** panel on the left and the JavaScript editor on the right.
---
#### **Check the Warm-Up Tag in the Code**
The JavaScript uses a tag to identify the Mailchimp contacts that should be included in the warm-up process.
1\. In the code editor, find the `WARMUP_TAG` variable.
2\. It may look similar to: const WARMUP\_TAG = "warmupsplit20270";
3\. Keep this value in mind. You will replace it with the exact Mailchimp tag you create in the next steps.
**Note:** The tag name in the JavaScript must match the Mailchimp tag exactly.
---
#### **Create a Warm-Up Tag in Mailchimp**
Now create the tag that will identify your warm-up contacts.
1\. Open Mailchimp in a new browser tab.
2\. Go to **Audience \> Tags**.
3\. Click **Create new tag**.
4\. When the **What should we name this tag?** window appears, enter a name for your tag.
For example, enter `Warmup20270Seedlist`.
5\. Click **Create**.
6\. Mailchimp should display a confirmation that the tag was successfully created.
---
#### **Add the Mailchimp Tag to the Zapier Code**
Return to Zapier and connect the code to the tag you just created.
1\. Switch back to the **Code by Zapier** step.
2\. Find the `WARMUP_TAG` variable.
3\. Replace its value with the exact name of your Mailchimp tag.
For example: const WARMUP\_TAG = "Warmup20270Seedlist";
**Note:** Make sure the capitalization and spelling match the Mailchimp tag.
---
#### **Create a Mailchimp Segment for the Tag**
Create a segment so Mailchimp can filter contacts based on your warm-up tag.
1\. Return to Mailchimp.
2\. Go to **Audience \> Segments**.
3\. Click **Create segment**.
4\. In the **Segment Builder**, find **How your contacts are tagged**.
5\. Click the **+** icon next to this option.
6\. Select **Tags** from the filter menu.
7\. Open **Select or search a tag**.
8\. Search for and select your warm-up tag, such as `Warmup20270Seedlist`.
9\. The filter should now look similar to: **Tags is any of Warmup20270Seedlist**
10\. Click **Use segment**.
---
#### **Name and Save the Segment**
Save the segment so you can easily identify it later.
1\. When the **Name your segment** window appears, enter a descriptive name.
2\. For example, use `WarmupWithSeedlist20270`.
3\. Click **Save & exit**.
4\. Mailchimp will confirm that your segment is building.
5\. The segment will then appear in your saved segments.
**Note:** The segment name is separate from the tag name. The tag identifies contacts, while the segment uses that tag as a filter.
---
#### **Configure the Warmy and Mailchimp API Keys**
Return to the **Run JavaScript** step in Zapier and configure the required input values.
In the **Input Data** panel, locate these fields:
- `warmy_api_key```
- `mailchimp_api_key`
- `audience_id`
- `split_id`
- `initial_count`
For the API keys, use Zapier Global Variables instead of entering the keys directly into the code step.
To configure `warmy_api_key`:
1\. Click the **field mapping** icon next to `warmy_api_key`.
2\. Open the **Variables** tab.
3\. Under **Global**, select **WarmAPIKey**.
4\. Close the Variables menu.
Repeat the same process for `mailchimp_api_key`:
1\. Open the field mapping menu.
2\. Select **Variables \> Global**.
3\. Choose **MailChimpAPIKey**.
For `audience_id`, select:
**Variables \> Global \> AudienceID**
---
#### **Find Your Mailchimp Audience ID**
The workflow also needs the ID of the Mailchimp audience that contains your contacts.
1\. Open the Mailchimp API documentation.
2\. Go to **Lists/Audiences**.
3\. Select **Get lists info**.
4\. Change the code sample language to **Python** if you want to view the developer-ready example.
5\. Review the API endpoint and example response.
6\. Find the audience/list that you want to use.
7\. Copy its ID.
8\. Return to Zapier and enter it in the `audience_id` field.
If you have already stored the ID as a Global Variable, you can map **AudienceID** instead.
---
#### **Configure the Split and Contact Growth**
Set the values that control the contact rotation and growth.
1\. In the **Input Data** panel, find `split_id`.
2\. Enter your Warmy split ID, such as `20270`.
3\. Find `initial_count`.
4\. Enter the starting number of contacts, such as `30`.
5\. In the JavaScript editor, find the `growthRate` variable.
6\. Set the growth rate you want to use.
For example: growthRate = 0.04
This applies a **4% growth rate**.
**Tip:** Adjust the growth rate to match your warm-up strategy rather than using the example value automatically.
---
#### **Run the Code to Test the Workflow**
Before publishing the Zap, run the code and check the results.
1\. Click **Run Code** at the top of the code editor.
2\. Wait for the code to finish.
3\. Review the **Output Data** panel.
4\. Check the following values:
**• Removed** — contacts removed during the rotation.
**• Added** — contacts added during the rotation.
**• New Count** — total contacts after the rotation.
**• Growth Rate Applied** — growth percentage applied to the contact list.
5\. Review the runtime information and logs for any errors.
The output gives you a quick way to confirm that the rotation worked as expected.
---
#### **Verify the Contacts in Mailchimp**
After the test finishes, verify the result in Mailchimp.
1\. Return to Mailchimp.
2\. Go to **Audience \> Tags**.
3\. Find your warm-up tag.
4\. Click **View** next to the tag.
5\. The Contacts page will show the contacts assigned to that tag.
6\. Compare the contact count with the **New Count** shown in Zapier.
For example, if Zapier reports a new count of **31**, Mailchimp should show the corresponding number of contacts with that tag.
---
#### **Test the Rotation Again**
Run the code one more time to make sure the rotation and growth process continues to work.
1\. Return to the **Code by Zapier** step.
2\. Click **Run Code** again.
3\. Wait for the execution to finish.
4\. Review the updated **Output Data**.
5.Check the new contact counts and growth rate.
This second test helps confirm that the workflow can rotate contacts and increase the list over multiple runs.
---
#### **Filter Mailchimp Contacts by the Warm-Up Tag**
You can also verify the tag directly from the Mailchimp Contacts page.
1\. Go to **Audience \> Contacts**.
2\. If another tag filter is active, click **Clear**.
3\. Open the **Tags** filter.
4\. Select the checkbox next to your warm-up tag.
5\. Mailchimp will update the contact list to show only contacts with that tag.
For example, the filtered list may show **33 contacts** after the second rotation.
---
#### **Enable Extended Runtime for Large Audiences**
If you're working with a large number of contacts, give the Zap enough time to finish processing them.
1\. Return to the Zapier workflow editor.
2\. Find the **Runtime** section in the left navigation panel.
3\. Expand the **Extended runtime** options.
4\. Select a longer runtime, such as **8 minutes — Up to 10 additional tasks**.
**Note:** A longer runtime can help prevent the process from stopping before all contacts are processed when working with larger audiences.
---
#### **Review the Configuration and Publish the Zap**
Before activating the automation, review all of your settings.
Make sure the following values are configured:
| Field | Configuration |
| --- | --- |
| `warmy_api_key` | **WarmAPIKey** Global Variable |
| `mailchimp_api_key` | **MailChimpAPIKey** Global Variable |
| `audience_id` | Your Mailchimp audience/list ID |
| `split_id` | Your Warmy split ID |
| `initial_count` | Starting contact count |
| `WARMUP_TAG` | Exact Mailchimp tag name |
Also confirm that the tag name in your JavaScript code exactly matches the tag you created in Mailchimp.
When everything looks correct:
1\. Click **Publish** in Zapier.
2\. Your Zap will become active.
3\. The workflow will run according to the schedule you configured.
4\. During each run, the automation will rotate the warm-up contacts and apply the configured growth rate.
---
#### **Expected Result**
Your Zapier automation is now configured to run your Mailchimp and Warmy contact workflow automatically.
At the scheduled time, the Zap can:
1\. Identify contacts using your Mailchimp warm-up tag.
2\. Rotate contacts through the warm-up process.
3\. Increase the contact count according to your growth rate.
4\. Update the Mailchimp contact list.
5\. Repeat the process automatically each day.
Your Mailchimp tag and segment should remain available so you can easily identify and filter the contacts used for your warm-up workflow.
---
### **How to Automate Seed List Email Sync Between Mailchimp, Zapier, and Warmy**
#### **Introduction**
You can connect Mailchimp and Warmy through Zapier to automatically sync seed list contacts and keep your Mailchimp audience updated.
This workflow uses Mailchimp tags and segments to organize contacts, while Zapier processes contact updates and Warmy webhooks send seed list notifications. Once configured, the workflow can automatically add and remove contacts as seed list events occur.
---
#### **Open the Mailchimp Tags Section**
Start by creating the tags that will identify the contacts used by the automation.
1\. Log in to Mailchimp.
2\. Open the **Audience** dashboard.
3\. Click **Tags** in the left navigation menu.
---
#### **Create a Tag for Seed List Emails**
Create a tag that will identify your seed list contacts.
1\. Click **Create New Tag** or **Create tag**.
2\. When Mailchimp asks **What do you want to name this tag?**, enter a descriptive name.
3\. For example, use `seedlist_mss_00279`.
4\. Click **Create**.
The tag is now available in your audience and can be used to identify seed list contacts.
---
#### **Create a Tag for Contacts to Remove**
Create a second tag for contacts that need to be removed later.
1\. Return to the **Tags** page.
2\. Click **Create New Tag** again.
3\. Enter a name for the contacts-to-remove tag.
4\. Click **Create**.
**Important:** Use the exact same name for this tag in your Zapier code. Even a small difference in spelling can prevent the workflow from finding the correct contacts.
---
#### **Open the Mailchimp Segments Section**
Next, create segments based on the tags you just created.
1\. In Mailchimp, open **Segments** from the left navigation menu.
2\. Click **Create Segment**.
---
#### **Create a Segment for Seed List Contacts**
Create a segment that contains contacts with your seed list tag.
1\. In the **Segment Builder**, open the conditions dropdown.
2\. Select **Tags**.
3\. Click **Select or search a tag**.
4\. Select the seed list tag you created earlier.
5\. Apply the filter.
6\. Enter a descriptive name for the segment.
7\. Click **Save and Exit**.
You can now use this segment to identify your seed list contacts.
---
#### **Create a Segment for Contacts to Remove**
Create another segment for contacts that should be removed from the workflow.
1\. Click **Create Segment** again.
2\. Select **Tags** as the filter.
3\. Choose the remove tag you created earlier.
4\. Give the segment a descriptive name, such as **Contacts to Remove**.
5\. Click **Save and Exit**.
**Tip:** You can reuse this segment when processing contacts from different seed lists.
---
#### **Open Warmy**
Now create the API key that Zapier will use to communicate with Warmy.
1\. Open Warmy in a new browser tab.
2\. Log in to your Warmy dashboard.
3\. Open the **API Keys** section.
---
#### **Create a Warmy API Key**
Generate an API key for the Zapier integration.
1\. Click **Add API Key** or **Create Key**.
2\. Enter a clear name for the API key.
3\. Click **Create Key**.
4\. Copy the generated API key and save it somewhere secure.
You will use this key when configuring your Zapier variables.
**Note:** Treat your API key like a password. Do not share it publicly or place it directly in documentation or screenshots.
---
#### **Open Your Zapier Workflow**
Return to Zapier and open the Zap you will use for the seed list synchronization.
1\. Open your existing Zap or create the workflow.
2\. Open **Manage Variables**.
3\. Configure the values required by the workflow as global variables.
Add the following variables:
**• Warmy API Key** — the API key created in Warmy.
**• Mailchimp Audience ID** — the ID of your Mailchimp audience.
**• Email Address / User ID** — the value provided by the **send emails** webhook step.
---
#### **Get Your Mailchimp Audience ID**
The Mailchimp Audience ID is not available directly in the Mailchimp interface.
You need to retrieve it using the Mailchimp API.
1\. Open the Mailchimp API.
2\. Use a request that retrieves your audiences or lists.
3\. Review the response.
4\. Find the ID of the audience you want to use.
5\. Save this ID as a Zapier global variable.
**Note:** Make sure you use the audience that contains the contacts for this workflow.
---
#### **Configure the Zapier Webhook**
Now configure the webhook that will receive information from the workflow.
1\. In your Zap, locate the **Webhook by Zapier** trigger step.
2\. Add the required **event type**.
3\. Configure the webhook to extract the following values from the incoming data:
**• ID
• Removed emails
• Balanced emails**
4\. Copy the **Webhook URL** generated by Zapier.
You will use this URL in both the Zapier code and Warmy notification settings.
**Important:** Run the webhook at least once manually from your side. This allows Zapier to establish the connection and capture a sample request.
---
#### **Add the Webhook URL to the Code**
Use the webhook URL in your JavaScript code.
1\. Paste the Zapier webhook URL into the appropriate field.
2\. Open the **Code by Zapier** step.
3\. Add the webhook URL to the code.
4\. Click **Run** to execute the code once.
This test allows Zapier to receive and process the webhook data.
---
#### **Select a Record From the Test Run**
After the webhook has been triggered, select a sample record.
1\. Click **Select record from running** or **Select Record from Listing**.
2\. Review the available test records.
3\. Select the appropriate record.
4\. Click **Continue with selected record**.
Zapier will use the selected record as the sample data for the workflow.
---
#### **Increase the Code Runtime**
The workflow may need several minutes to process contacts.
1\. Open the settings for the **Code by Zapier** step.
2\. Find the **Runtime** setting.
3\. Increase the runtime to approximately **4–8 minutes**.
This gives the code enough time to process the contacts without stopping early.
---
#### **Run the Full Code Step**
Test the complete code workflow.
1\. Click **Run** in the Code step.
2\. Wait for the process to finish.
3\. Confirm that the execution completes successfully.
A successful execution should show: **Process finished with exit code 0**
If you see an error instead, review the code, variables, webhook data, and API configuration before continuing. Verify the Mailchimp Sync
---
#### **Check the Seed List Tag**
Verify that the synchronization added contacts to Mailchimp.
1\. Return to Mailchimp.
2\. Open **Tags**.
3\. Select the tag you created for seed list emails.
4\. Check the contacts associated with the tag.
You should see new contacts added by the synchronization.
**Note:** Contacts added to a tag are also added to the corresponding segment automatically. However, Mailchimp may need some time to update the segment.
---
#### **Check the Seed List Segment**
Confirm that the new contacts eventually appear in the segment.
1\. Open **Segments** in Mailchimp.
2\. Select the seed list segment you created earlier.
Review the contacts in the segment.
If the segment initially shows **No contacts match this selection**, don't worry. The contacts may appear after Mailchimp finishes processing the tag changes. Test Contact Updates
---
#### **Run Another Zapier Test**
Next, test how the workflow handles contact updates.
1\. Return to Zapier.
2\. Run another test for the contacts that were synchronized.
3\. Wait for the process to complete.
---
#### **Run the Update Code**
Run the Code step again to process the update.
1\. Open the **Code by Zapier** step.
2\. Click **Run**.
3\. Wait for the code to finish.
---
#### **Trigger the Webhook for the Update**
Trigger the webhook so Zapier can process the updated data.
1\. Open the **Webhook** step.
2\. Select **New Test Raw** or **Test Raw Request**.
3\. Run the code for the update.
---
#### **Verify the Contacts to Remove**
Check whether the updated contacts were added to your removal segment.
1\. Return to Mailchimp.
2\. Open **Segments**.
3\. Select the **Contacts to Remove** segment.
4\. Verify that the expected contacts are listed.
The contacts that were marked for removal should now appear in this segment.
Configure Warmy Webhook Notifications
---
#### **Open the Warmy Notifications Hub**
The final part of the setup is connecting Warmy to the Zapier webhook.
1\. Return to Warmy.
2\. Open the **Notifications Hub** or notification settings.
---
#### **Enable Webhook Notifications**
Enable the webhook notification option.
1\. Find **Webhook** in the available notification options.
2\. Turn the webhook notification on.
---
#### **Add the Zapier Webhook URL**
Connect Warmy to the webhook you created in Zapier.
1\. Find the webhook URL field in Warmy.
2\. Paste the **Zapier Webhook URL** you copied earlier.
3\. Make sure the URL is complete and correct.
---
#### **Save and Verify the Notification Settings**
Finish the webhook configuration.
1\. Click **Save**.
2\. Confirm that **Seed List Notifications** are available and enabled.
Warmy can now send seed list notifications to your Zapier webhook when the configured events occur.
---
#### **Expected Result**
Your Mailchimp, Zapier, and Warmy workflow is now connected.
When the configured seed list events occur:
• Mailchimp tags identify the relevant contacts.
• Mailchimp segments organize those contacts.
• Zapier receives webhook data and processes the contact changes.
• Warmy sends seed list notifications to the Zapier webhook.
• Contacts can be added to the appropriate Mailchimp tags and segments.
• Contacts marked for removal can be identified through the **Contacts to Remove** segment.
The automation is now ready to synchronize seed list contacts between Warmy and Mailchimp through Zapier.
#### [Need help? **Schedule a call with us**](https://www.warmy.io/book-a-support-call)
- [Connection Guide](https://support.warmy.io/knowledge/connection-guide?hsLang=en)
- [General questions](https://support.warmy.io/knowledge/general-questions?hsLang=en)
- [Technical questions](https://support.warmy.io/knowledge/technical-questions?hsLang=en#main-content)
- [SPF and DKIM Configuration](https://support.warmy.io/knowledge/technical-questions?hsLang=en#spf-and-dkim-configuration)
- [Subscription](https://support.warmy.io/knowledge/subscription?hsLang=en)
- [Collaborate](https://support.warmy.io/knowledge/collaborate?hsLang=en)
- [Features](https://support.warmy.io/knowledge/features?hsLang=en)
- [Troubleshooting](https://support.warmy.io/knowledge/troubleshooting?hsLang=en#main-content)
- [SMTP Errors](https://support.warmy.io/knowledge/troubleshooting?hsLang=en#smtp-errors)
- [Service-related issues](https://support.warmy.io/knowledge/troubleshooting?hsLang=en#service-related-issues)
- [Integrations](https://support.warmy.io/knowledge/integrations?hsLang=en#main-content)
- [Seed List Automations](https://support.warmy.io/knowledge/integrations?hsLang=en#seed-list-automations)
[](https://www.warmy.io/)
warmy.io Help Center
Copyright © 2026, AnyBiz LTD