

 Prefer to listen? Hit play to hear this article read aloud.
❗IMAP
Since Elastic Email does not have an IMAP server, you can use another mailbox that can accept email, such as Gmail.
But! It is very important that the email address is exactly the same as the one you specified in SMTP.
For example, if you are using a Google or Outlook server, then you need to specify imap.google.com in the IMAP host field.
In the case of other providers, you can find out your IMAP host and port in your mailbox configuration on your provider's website.
Don't have IMAP or don't need it? Just disable it!
SMTP
- Go to your elasticemail.com account.
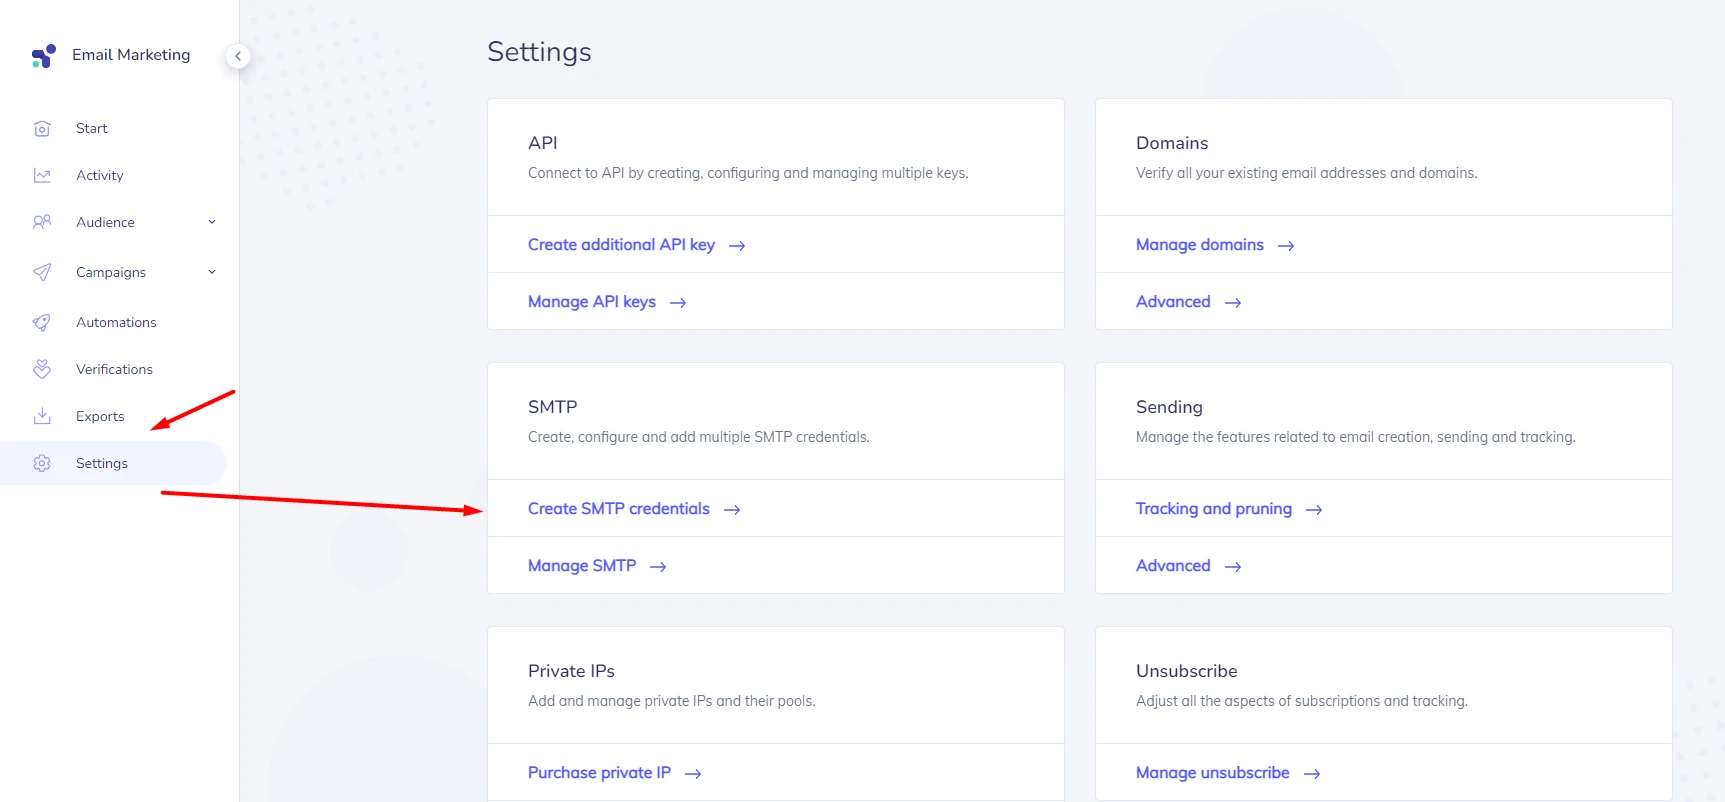
- Go to Settings tab, SMTP section, Create SMTP credentials.
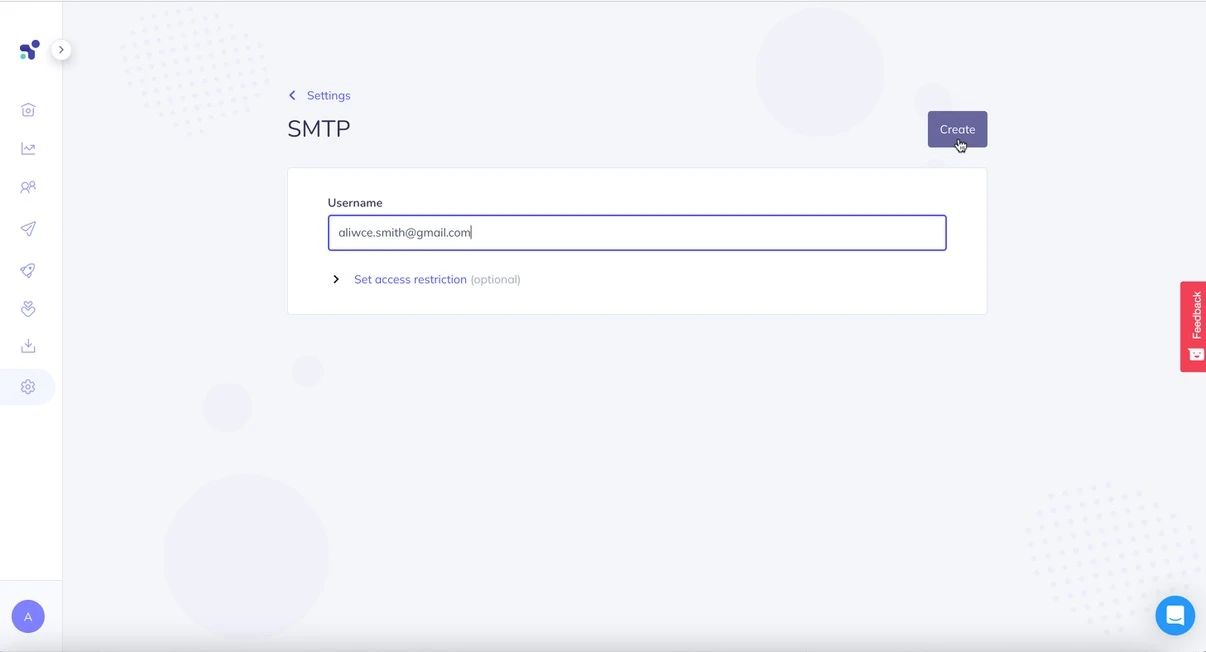
- Enter your email address and click Create.
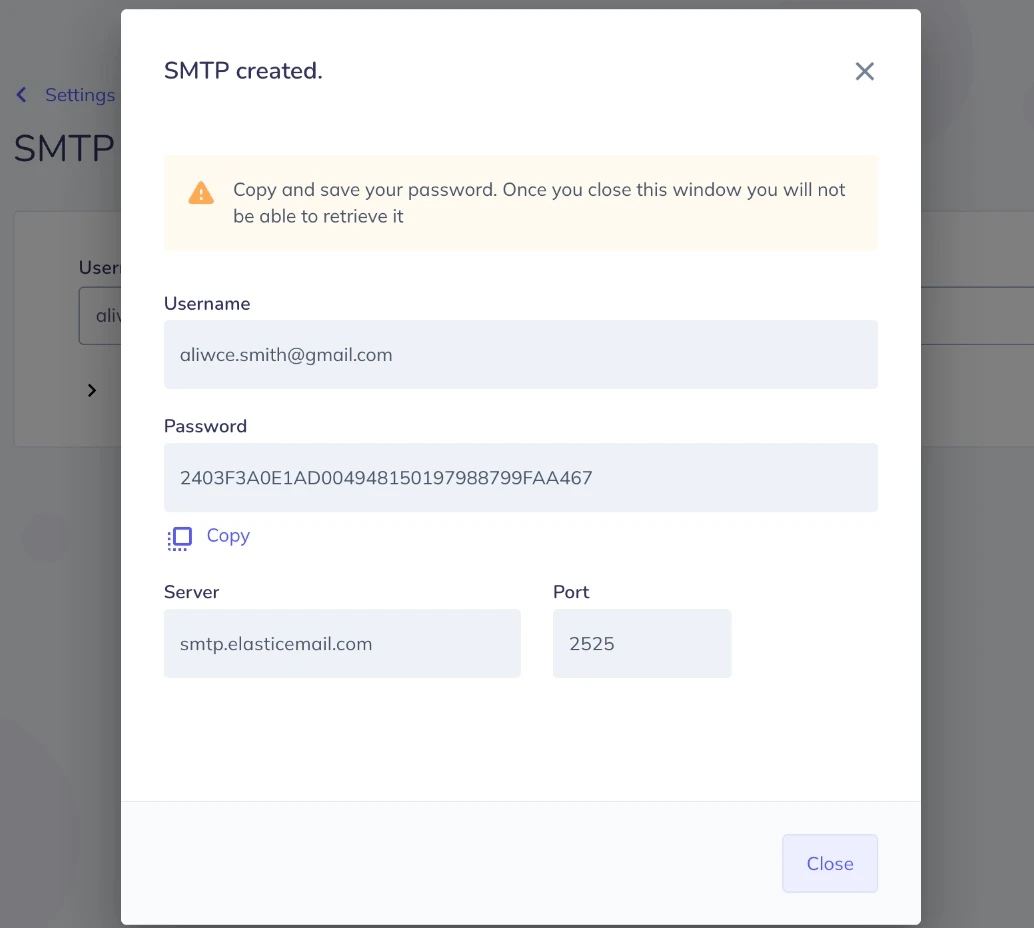
Your mailbox is created.👏
❗Save your mailbox password for connecting to Warmy.
 Completion
If you filled out everything correctly, then your mailbox connection form should look like this:
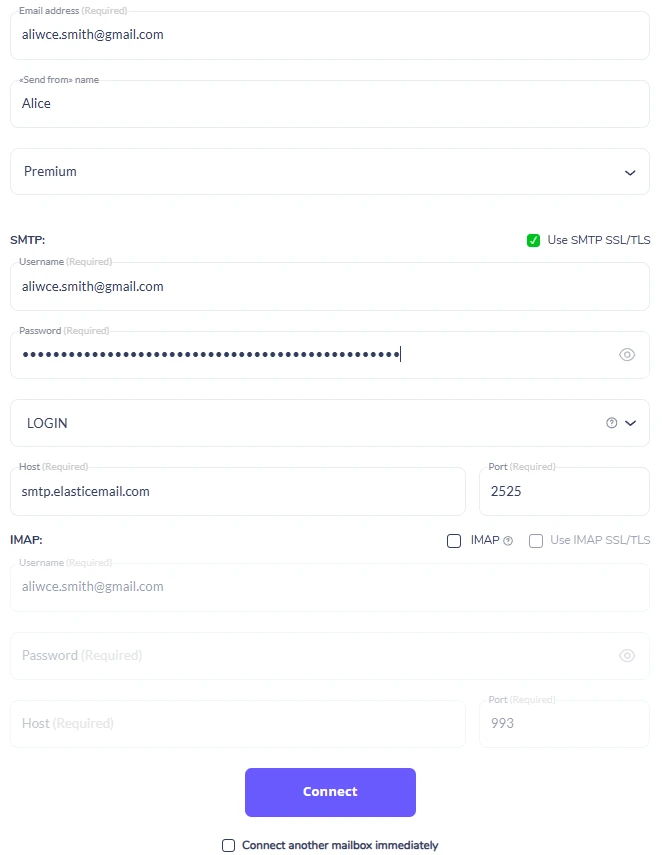
It remains only to click on the "Connect" button, and voila! Done. Your mailbox is successfully connected and has started warming up.🔥