---
title: How to Warm Up GoHighLevel on Warmy?
description: Connecting with Warmy Booking a Call for Further Assistance For personalized guidance on warming up GoHighLevel, please book a call with our team. We'll provide expert advice and support to ensure you
---
[Skip to content](https://support.warmy.io/knowledge/how-to-warm-up-gohighlevel-on-warmy#main-content)
English
Show submenu for translations
![Group 1261151152.png\]](https://support.warmy.io/hs-fs/hubfs/Group%201261151152.png?width=50&height=50&name=Group%201261151152.png)
Open main navigation
Close main navigation
- English
Show submenu for translations
- [Go to warmy.io](https://www.warmy.io/)
[Go to warmy.io](https://www.warmy.io/)
Hey there Warmer! How can we help? 🙏
- There are no suggestions because the search field is empty.
1. [Help Center](https://support.warmy.io/knowledge?hsLang=en)
2. [General questions](https://support.warmy.io/knowledge/general-questions?hsLang=en)
# How to Warm Up GoHighLevel on Warmy?
## Step-by-step guide to connecting your GoHighLevel mailbox to Warmy and starting your warm-up
**![What is GoHighLevel? \[Everything You Need to Know 2024\]](https://torchbankz.com/wp-content/uploads/2022/06/GO-HIGH-LEVEL.jpeg)**
**If you're using GoHighLevel for your email outreach, you can connect it to Warmy using a custom SMTP setup. This guide walks you through the full process in just a few steps. 🚀**
#### Step 1 — Start Adding a Mailbox in Warmy
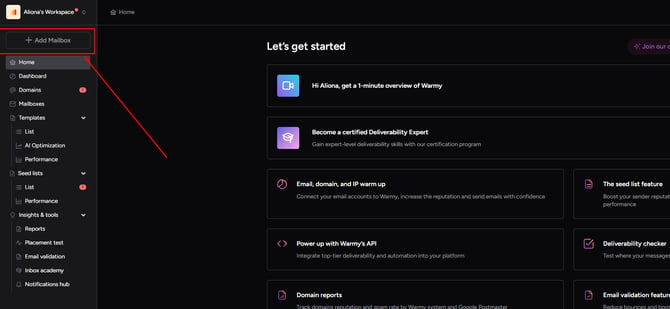
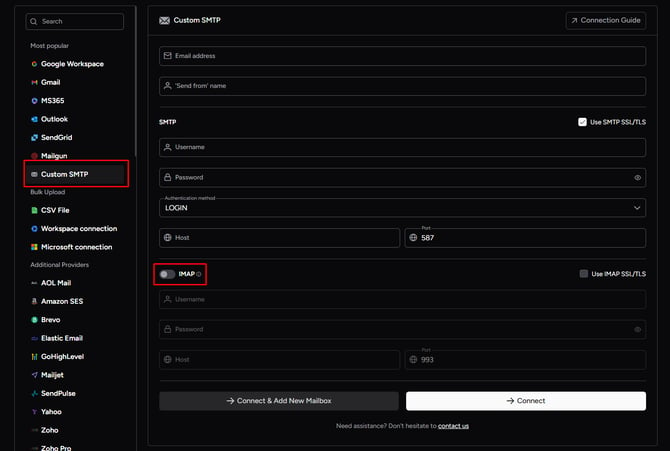
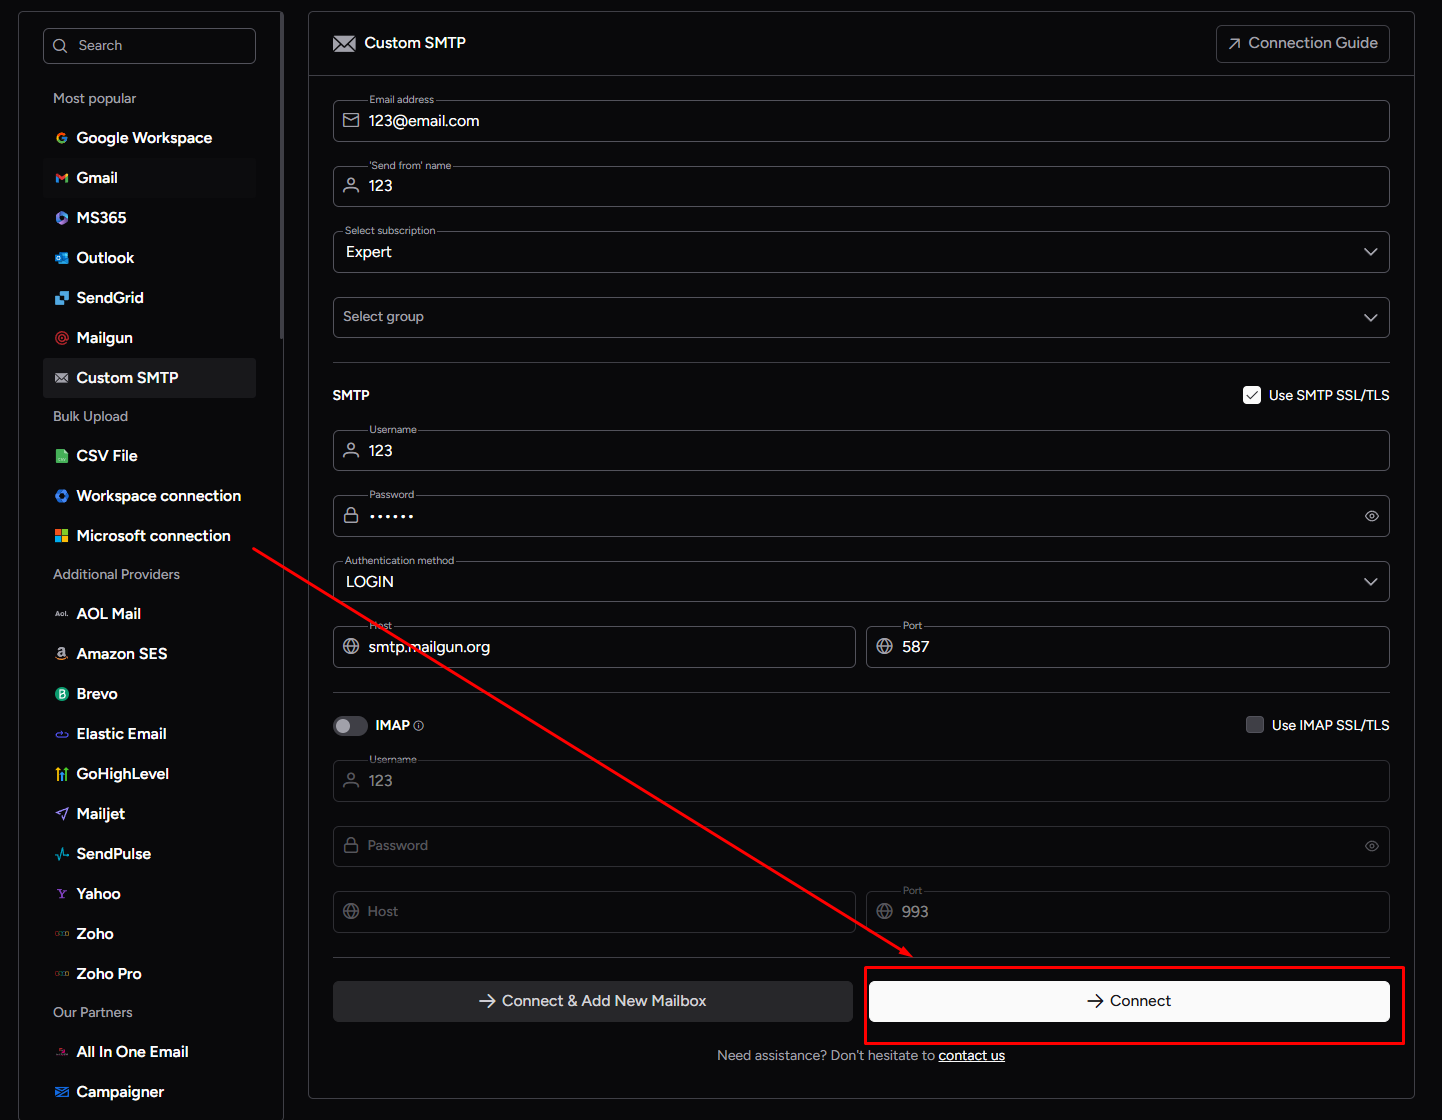
In your Warmy account, click **+ Add Mailbox** and select **Custom SMTP** as the connection method.
Enter your **email address** and **Send From name**, then select your **subscription plan**.
Turn off IMAP before proceeding — GoHighLevel does not support IMAP, so only SMTP is needed here.
---
#### Step 2 — Go to Your GoHighLevel Account
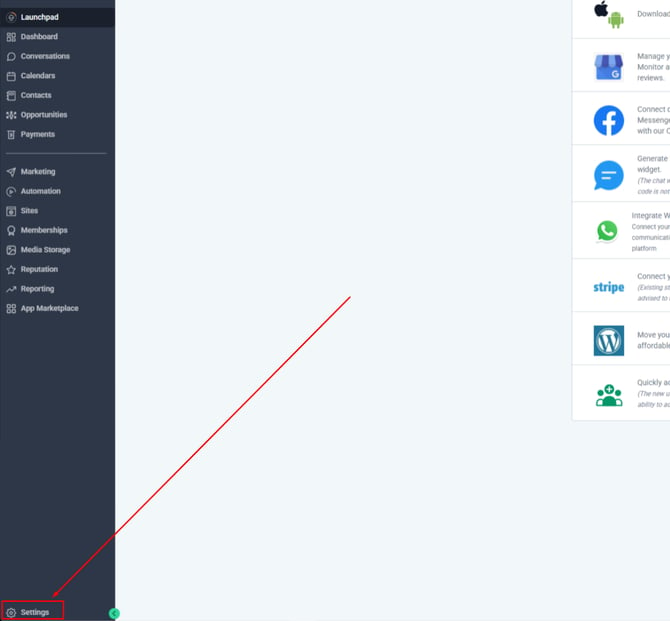
Switch over to your GoHighLevel account. In the left sidebar, click on **Settings**.
---
#### Step 3 — Navigate to Email Services
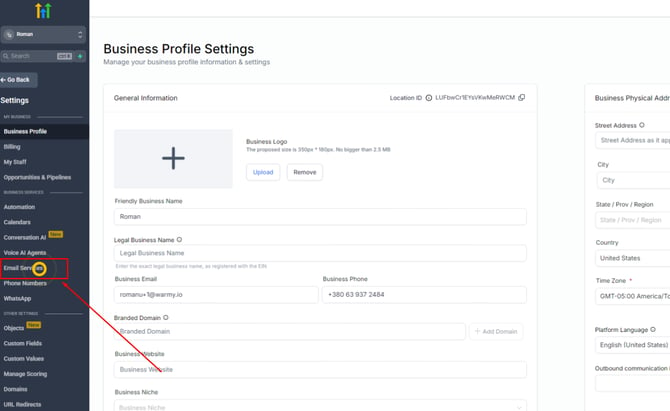
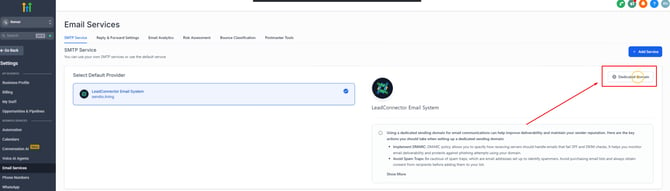
Inside Settings, go to **Email Services**, then select **Dedicated Domain**.
Make sure you have already **added and verified your dedicated domain before** this step — it is required for SMTP to work correctly.
---
#### Step 4 — Open SMTP Settings
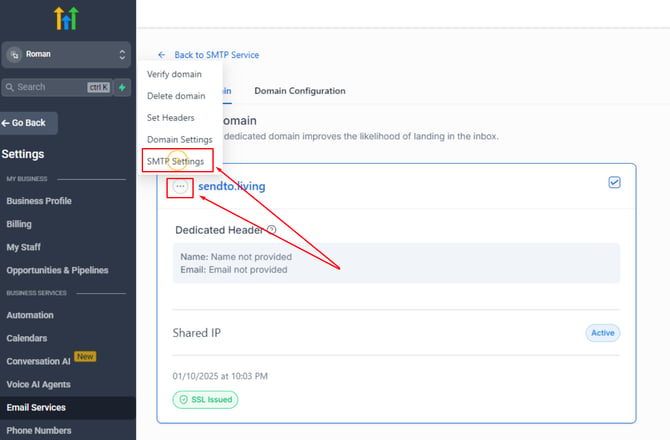
Within the Dedicated Domain section, click on **SMTP Settings**.
---
#### Step 5 — Create a New SMTP User
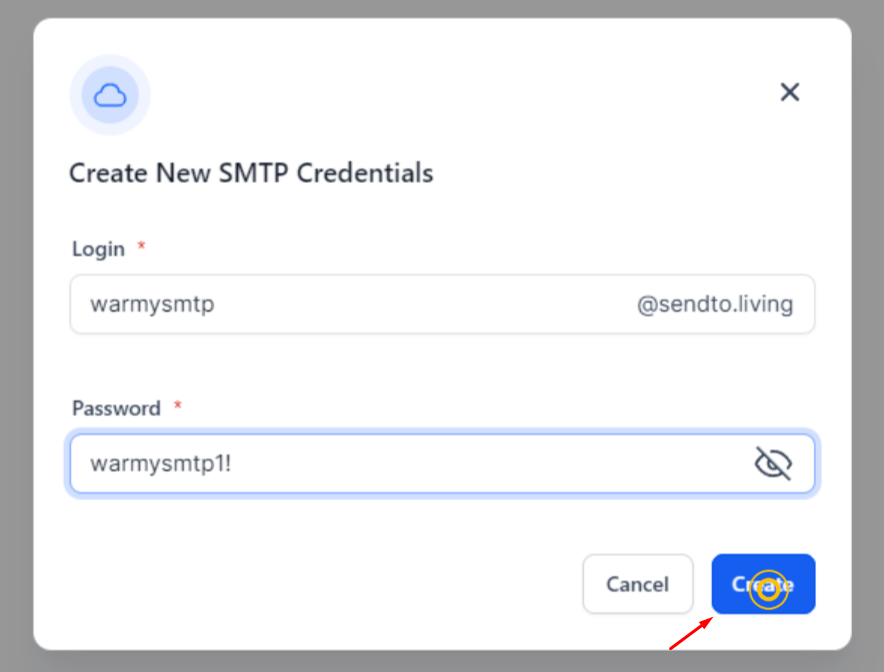
Click **Create New SMTP User**. Enter a **username** and **password** of your choice — make sure to save these, as you'll need them in the next step. Once entered, click **Create**.

---
#### Step 6 — Copy Your SMTP Credentials
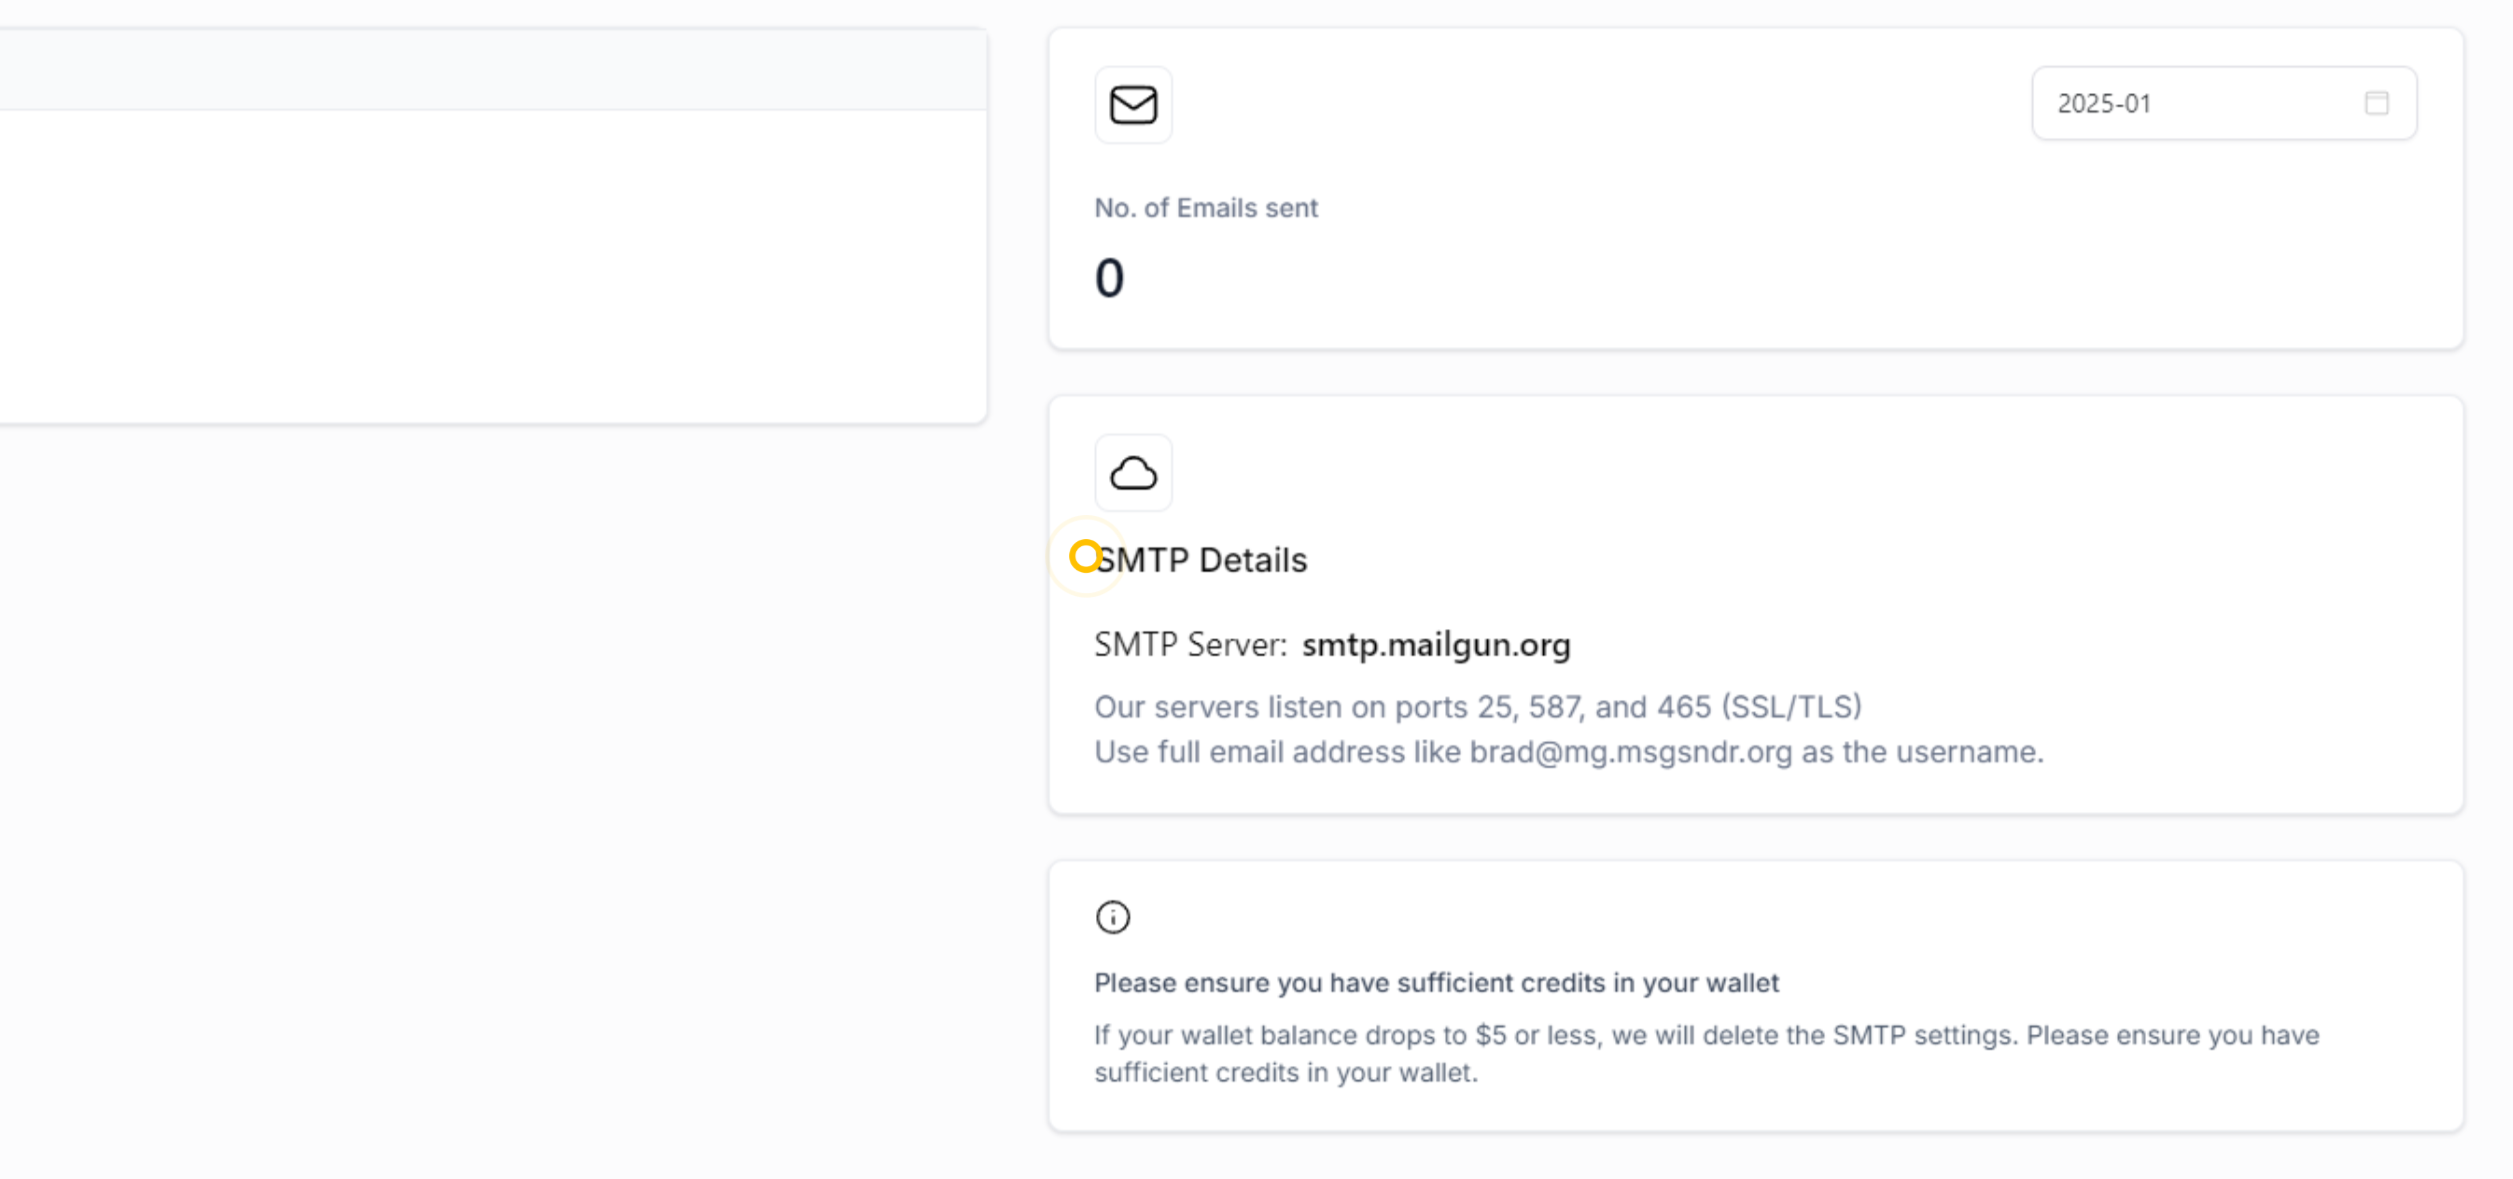
Once the SMTP user is created, take note of all the credentials shown — including the SMTP host, port, username, and password.
---
#### Step 7 — Enter the Details in Warmy and Connect
Go back to your Warmy account and fill in all the SMTP fields with the credentials you just copied from GoHighLevel. Once everything is entered, click **Connect**.
---
#### ✅ Done!
Your GoHighLevel mailbox is now connected to Warmy and your warm-up will start automatically after some delay!
#### [Need help? **Schedule a call with us 👨🏻💻**](https://www.warmy.io/book-a-support-call)
- [Connection Guide](https://support.warmy.io/knowledge/connection-guide?hsLang=en)
- [General questions](https://support.warmy.io/knowledge/general-questions?hsLang=en)
- [Technical questions](https://support.warmy.io/knowledge/technical-questions?hsLang=en#main-content)
- [SPF and DKIM Configuration](https://support.warmy.io/knowledge/technical-questions?hsLang=en#spf-and-dkim-configuration)
- [Subscription](https://support.warmy.io/knowledge/subscription?hsLang=en)
- [Collaborate](https://support.warmy.io/knowledge/collaborate?hsLang=en)
- [Features](https://support.warmy.io/knowledge/features?hsLang=en)
- [Troubleshooting](https://support.warmy.io/knowledge/troubleshooting?hsLang=en#main-content)
- [SMTP Errors](https://support.warmy.io/knowledge/troubleshooting?hsLang=en#smtp-errors)
- [Service-related issues](https://support.warmy.io/knowledge/troubleshooting?hsLang=en#service-related-issues)
- [Integrations](https://support.warmy.io/knowledge/integrations?hsLang=en#main-content)
- [Seed List Automations](https://support.warmy.io/knowledge/integrations?hsLang=en#seed-list-automations)
[](https://www.warmy.io/)
warmy.io Help Center
Copyright © 2026, AnyBiz LTD