![Group 1261151152.png]](https://support.warmy.io/hs-fs/hubfs/Group%201261151152.png?width=50&height=50&name=Group%201261151152.png)
✅ SPF: Supported
✅ DKIM: Supported
Maropost is an email marketing and automation platform. To ensure your emails are delivered successfully, you must first authenticate your domain by setting up SPF and DKIM.
Step 1 - Add Your Sending Domain in Maropost
- Log in to your Maropost account.
- Go to Settings → Sending Domains.
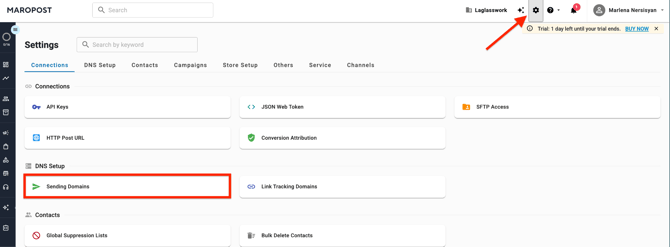
- Click Add Domain and enter your domain name (e.g., yourdomain.com).
- Maropost will generate the DNS records you need to add at your domain registrar.
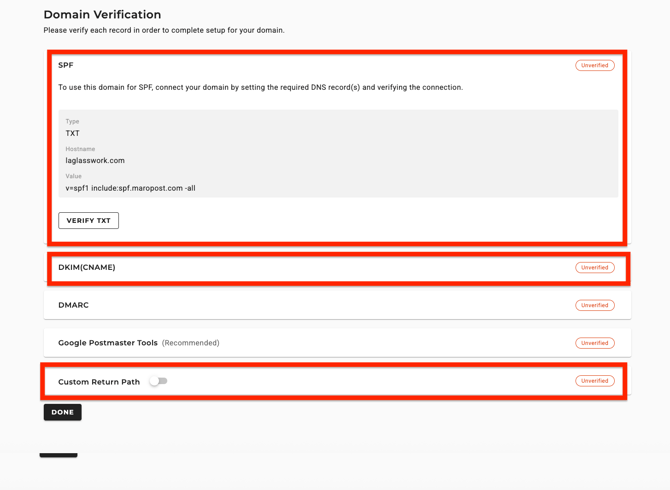
Maropost – SPF Record Configuration
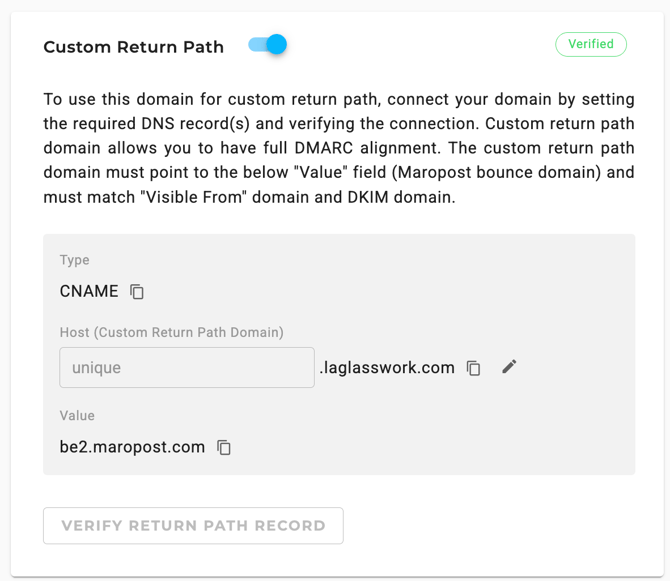
In most cases, you won't need to modify your root domain's existing SPF record. SPF authentication in Maropost is primarily handled through the Custom Return Path setup, you create a unique subdomain and publish the CNAME record Maropost provides, pointing it to be2.maropost.com.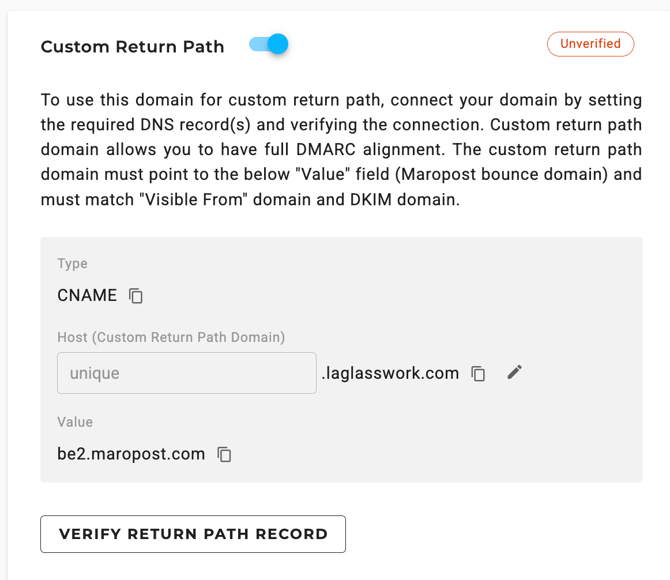
DNS (Cloudflare example):
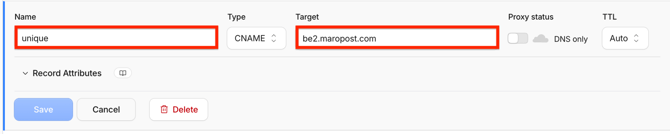
Once the record is added in your DNS, return to Maropost, enable the Custom Return Path toggle, and click Verify Return Path Domain. When configured correctly, the custom return path will show as verified.
However, to complete domain verification, Maropost also requires an SPF record on your root domain. If you already have one, add include:spf.maropost.com to your existing record. If you don't have one yet, publish the following TXT record in your DNS and verify it in Maropost:v=spf1 include:spf.maropost.com -all
Maropost - DKIM Record Configuration
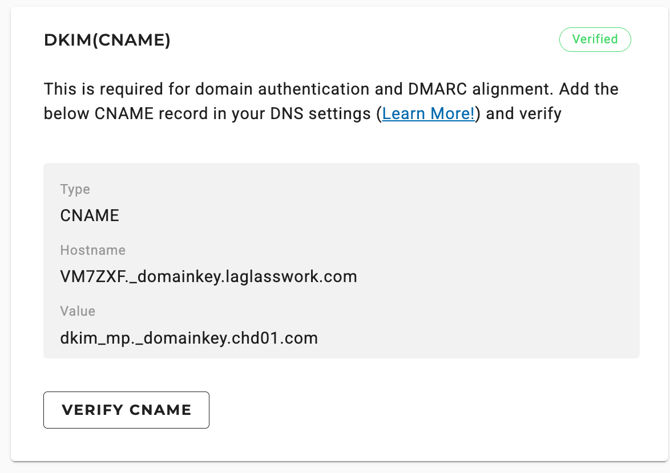
DKIM (DomainKeys Identified Mail) adds a cryptographic signature to your emails so receiving servers can confirm they haven't been tampered with in transit.To set up DKIM, click on the DKIM (CNAME) section within your Sending Domains settings. Maropost will display the CNAME record, copy the hostname and value and publish them in your DNS zone.
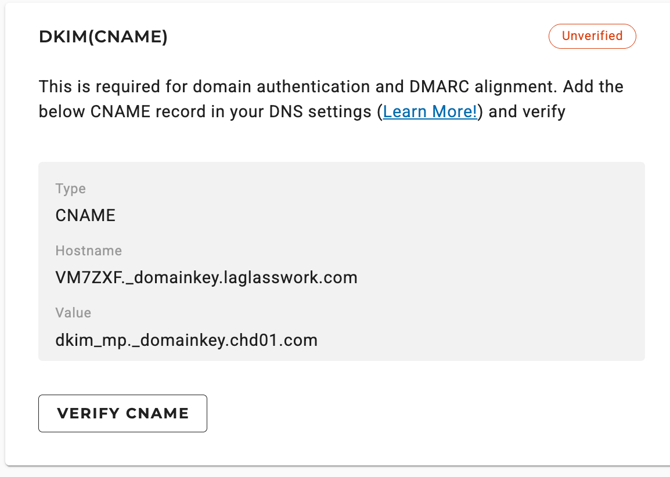
Once the record is added, return to Maropost and click Verify. When configured correctly, DKIM will show as verified.
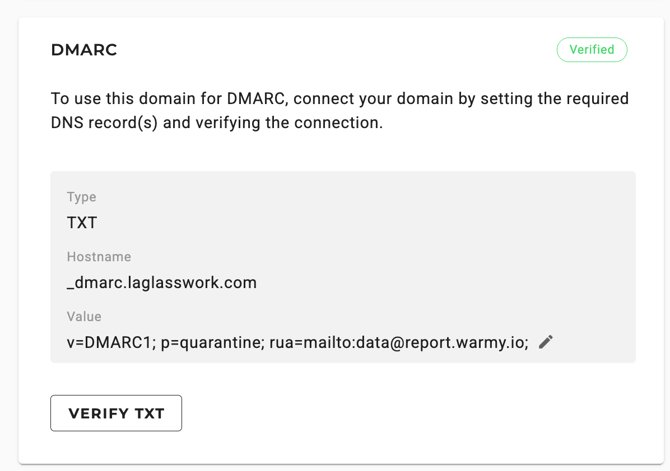
 Note: To complete domain verification, Maropost also requires a valid DMARC record. Enter your existing DMARC record in the DMARC section and verify it. If you don't have a DMARC record yet, you'll need to publish one in your DNS first, then enter it in that section.
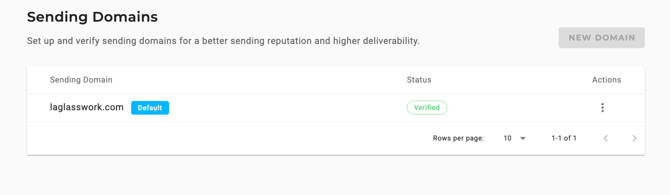
Once you follow all the instructions above, click on Done and the domain will get verified.
 You
You